

Instructions
Step by Step... Wear in front of the belly

Now the exact steps for putting on the baby carrier every day are explained in detail :)
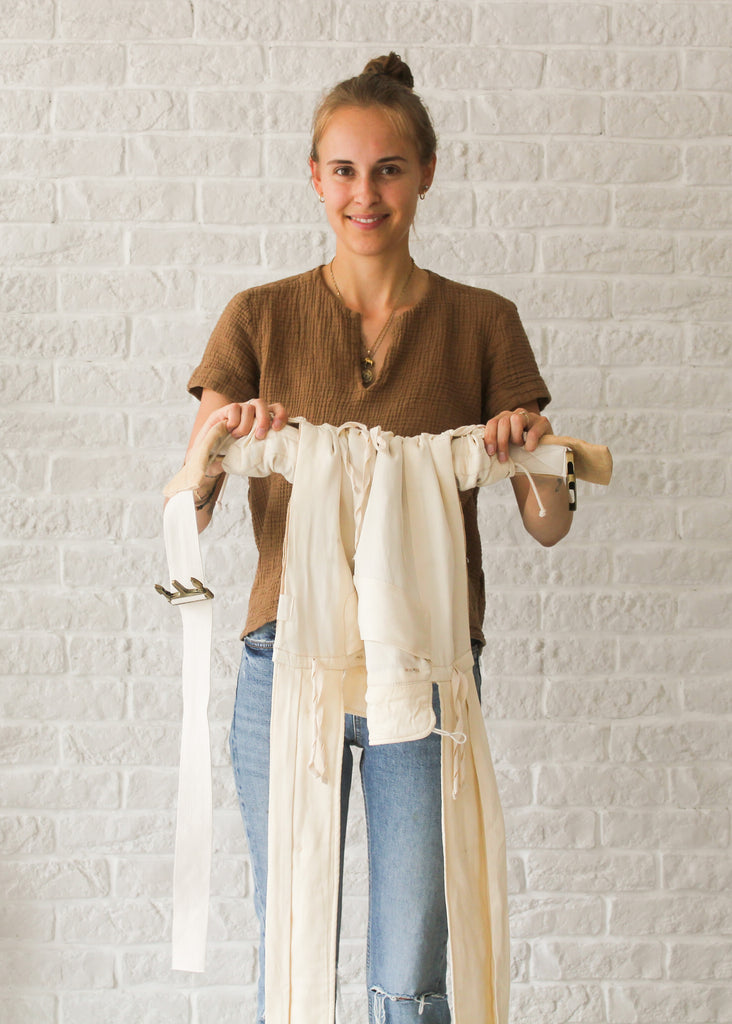
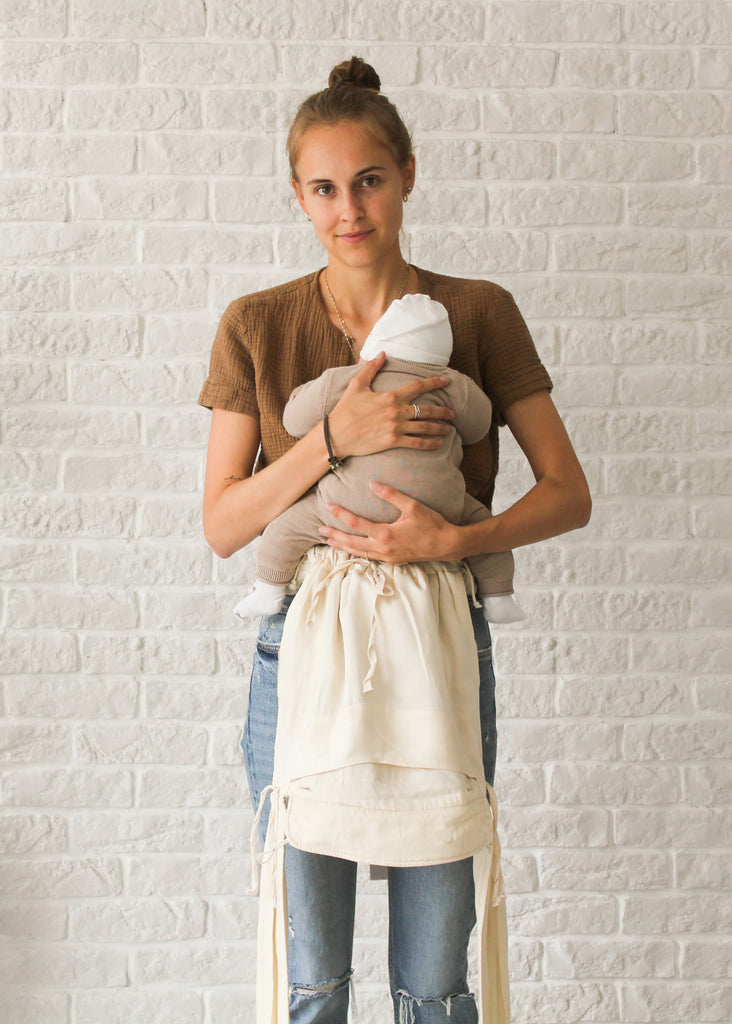
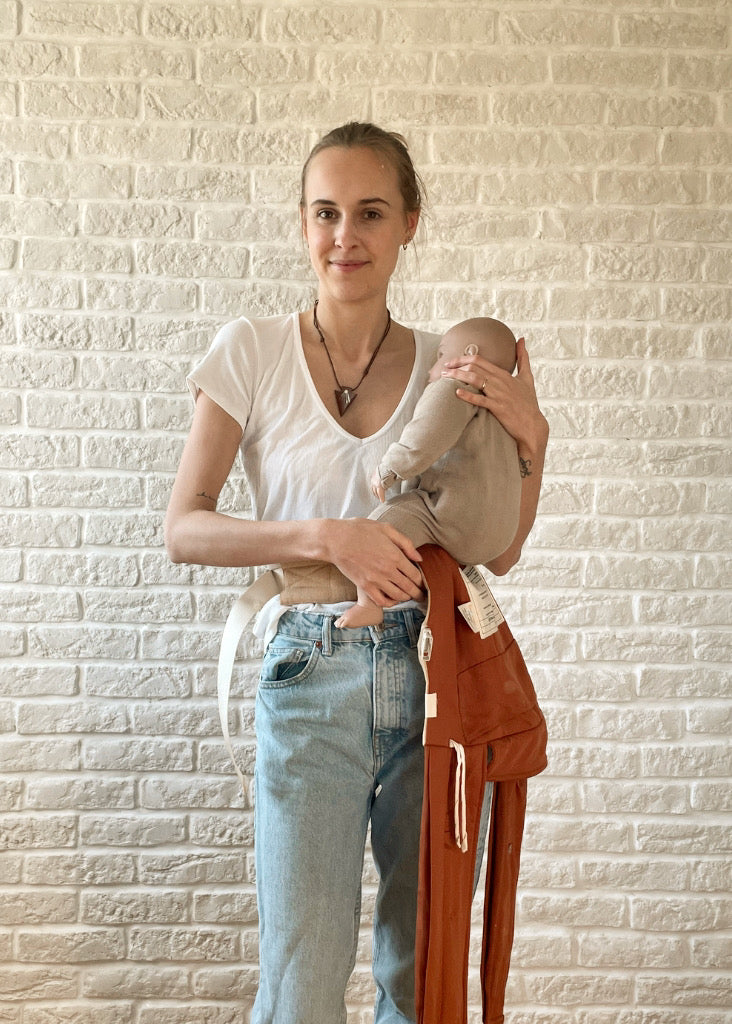
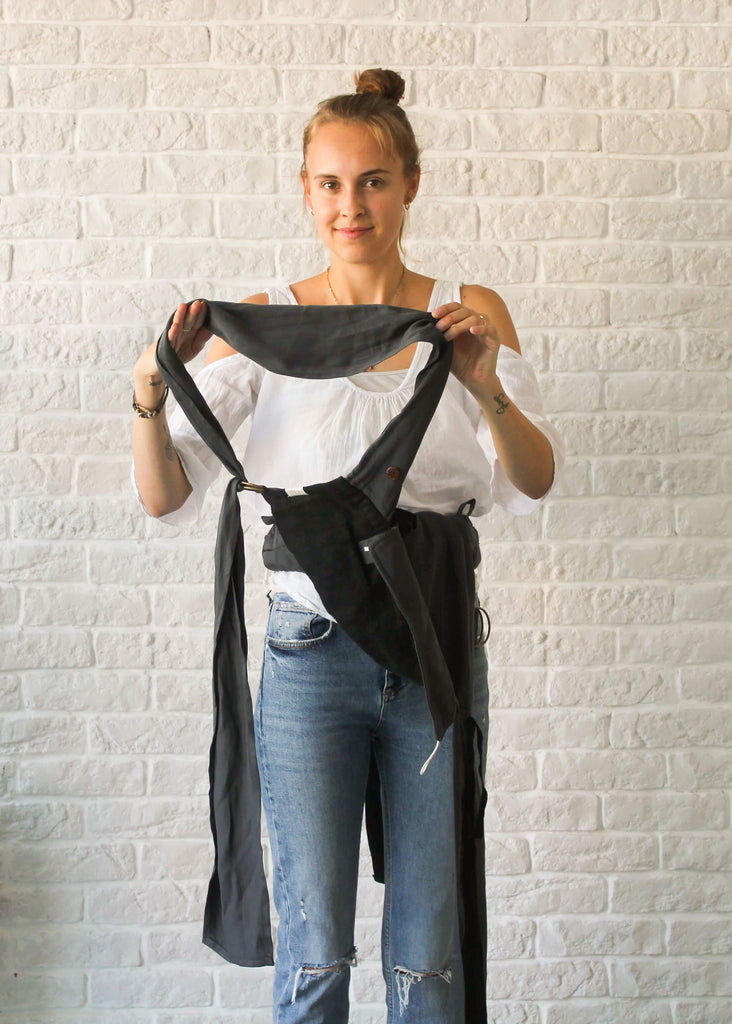
Hold the baby carrier with the label outwards in front of you and turn the waist belt so that the inside is facing your belly. The is our starting position.
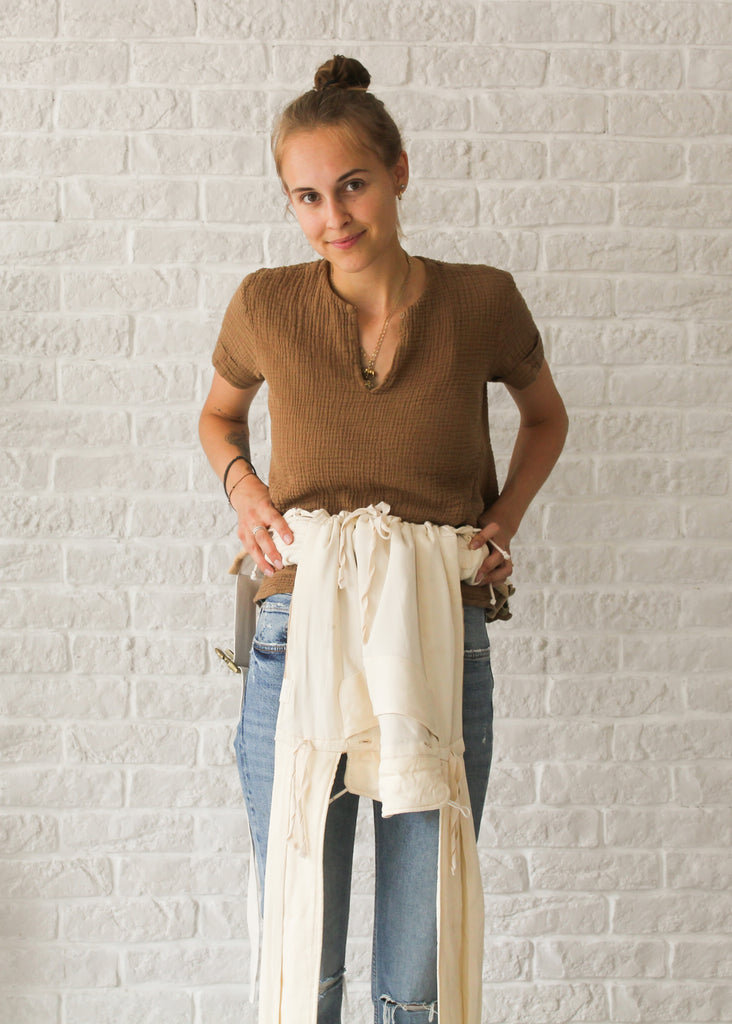
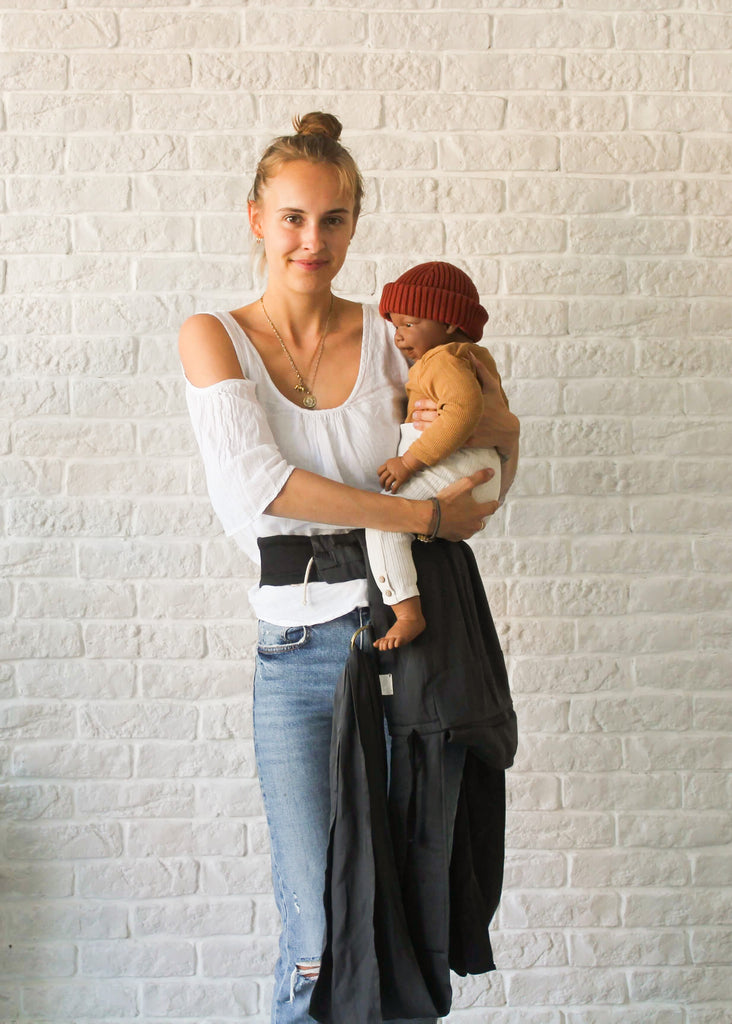
Now position the hip belt of your baby carrier above your hip bones (when it is high and tight, your hips will take most of the weight of your baby)
Close the buckle, pull the belt tight and the safety rubber over the buckle. Note: If the buckle is upside down, you can simply unthread it and thread it back in the right way (first from below through the 1st slot, then from above through the 2nd)
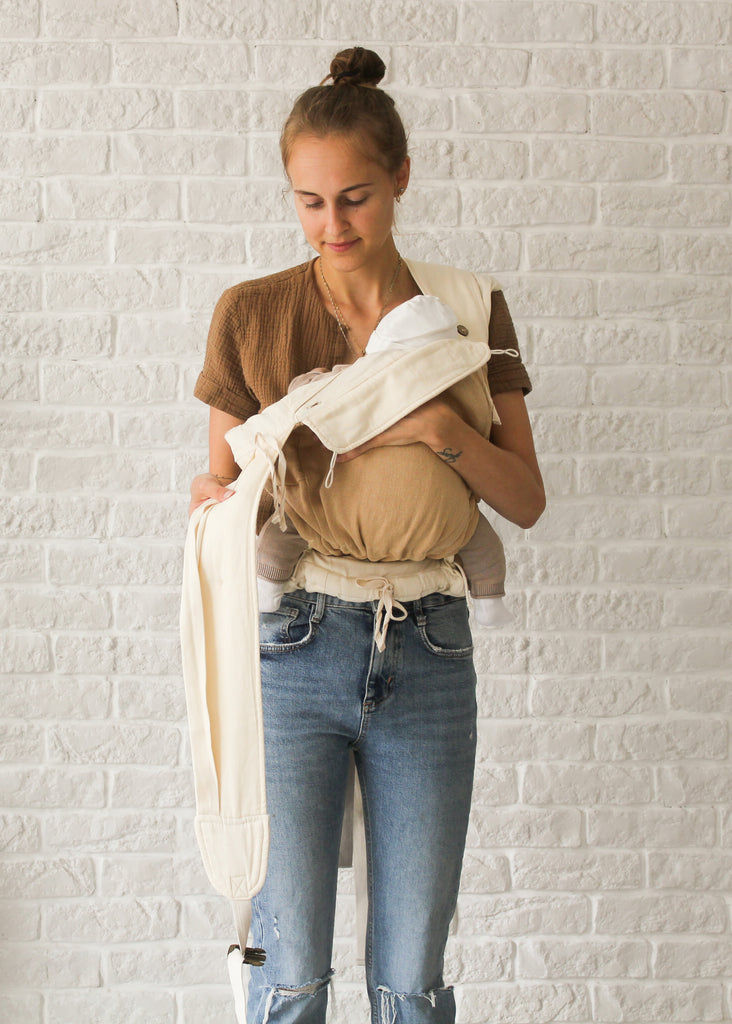
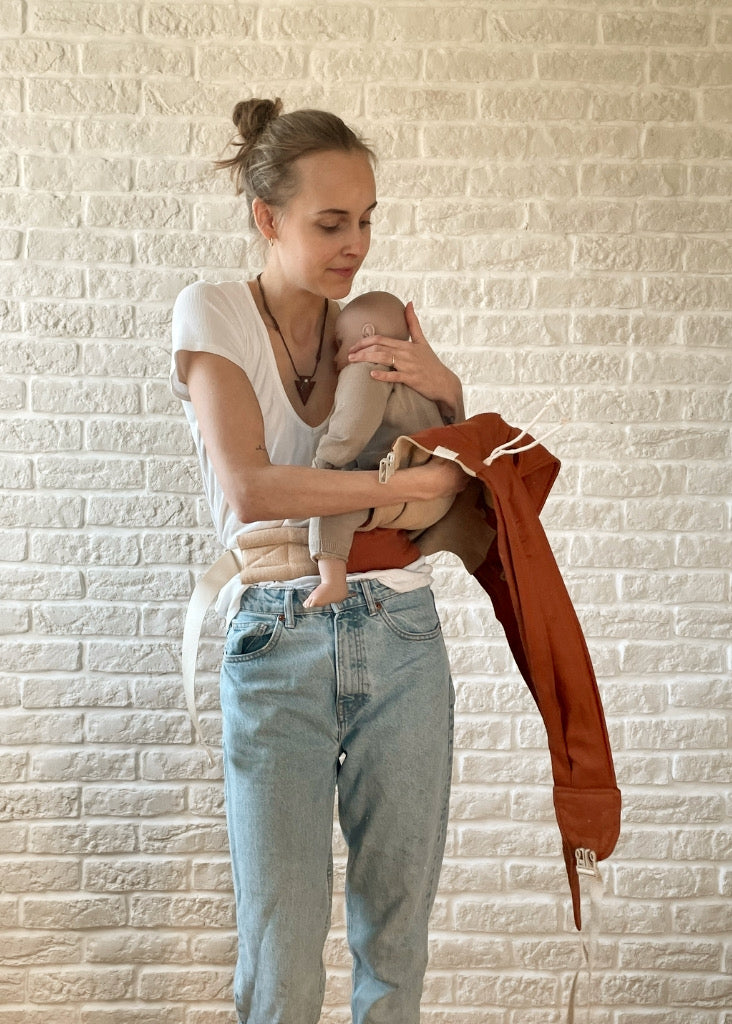
Now take your baby at shoulder height and slowly let it slide down onto your hips.
The sitting posture of your baby should look like an "M" (from the feet to the middle of the bottom and back again)
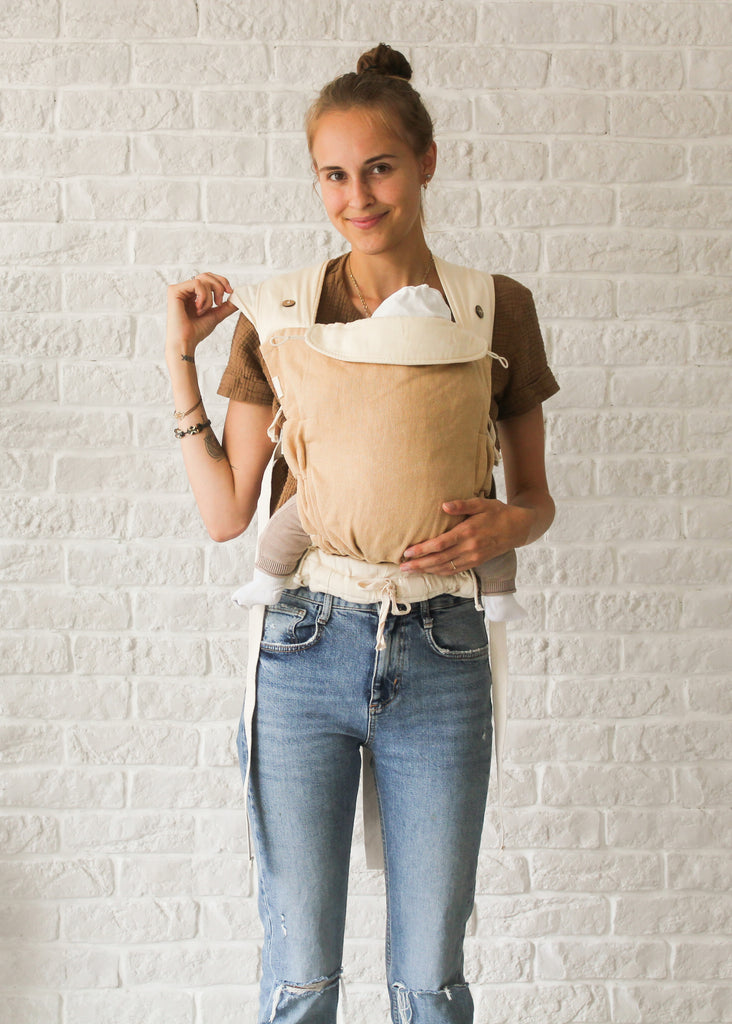
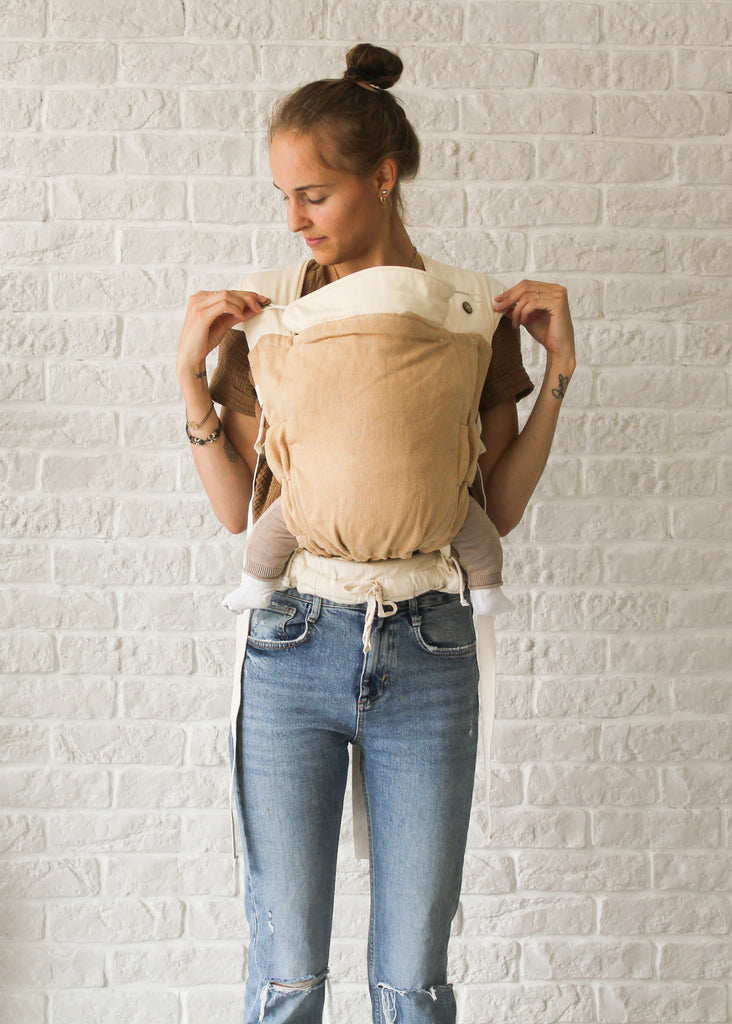
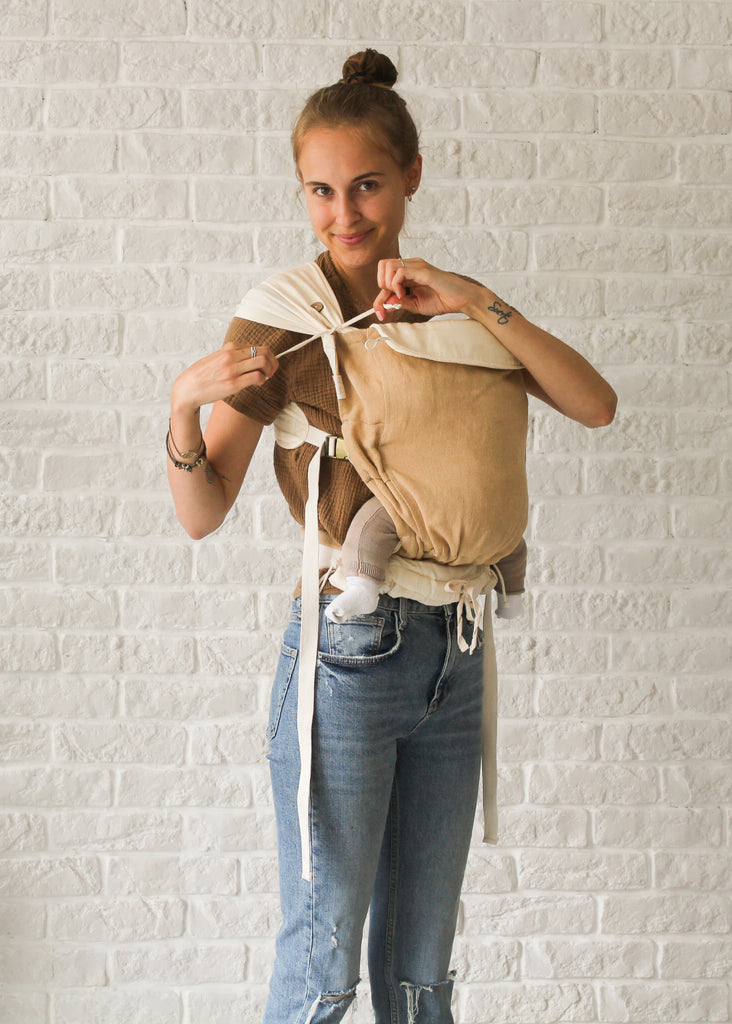
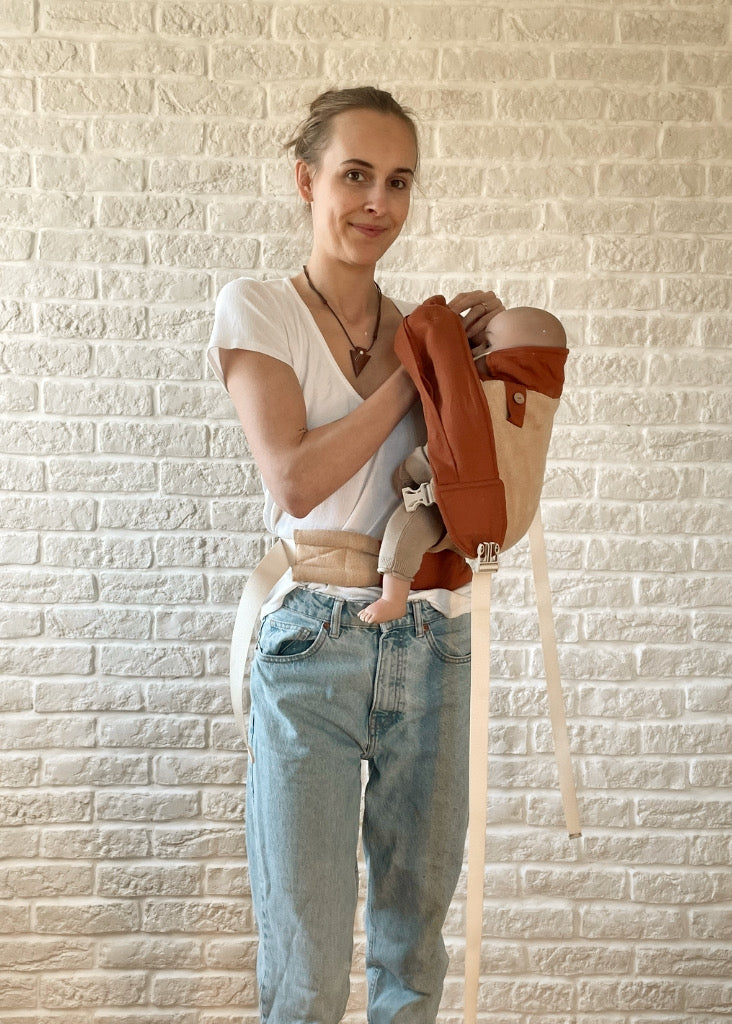
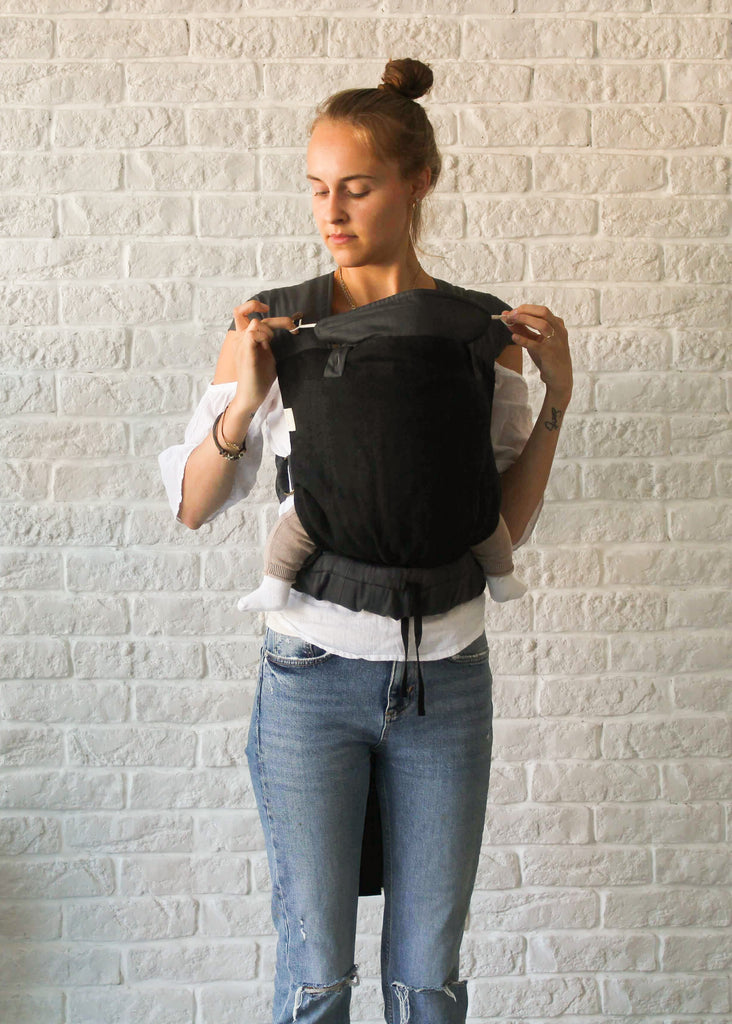
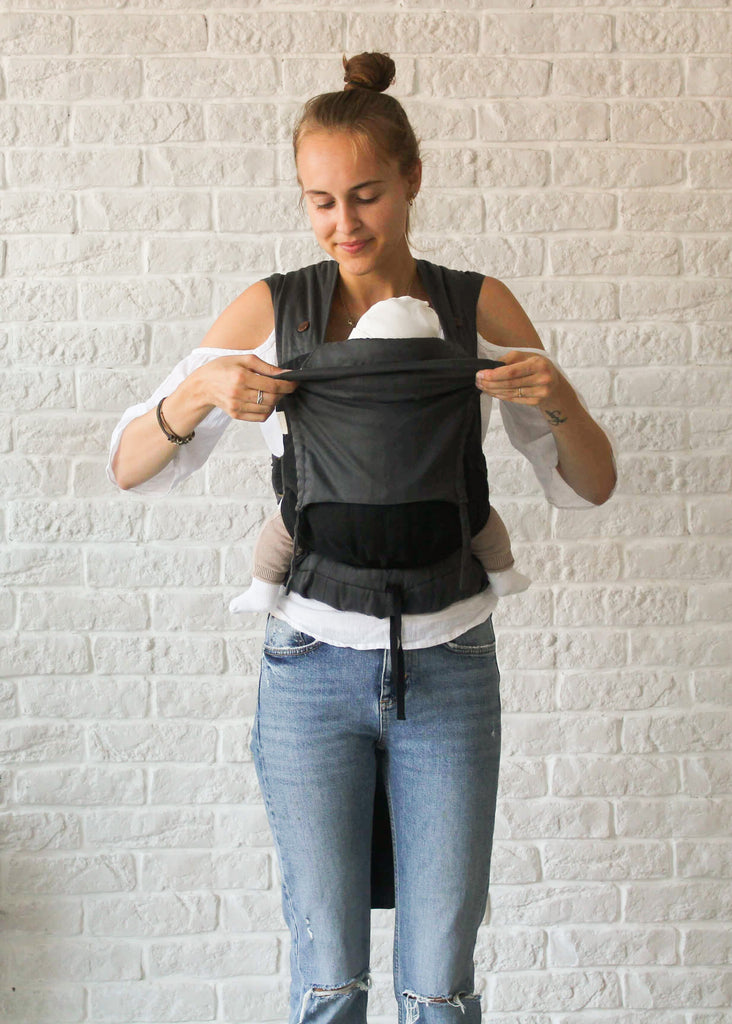
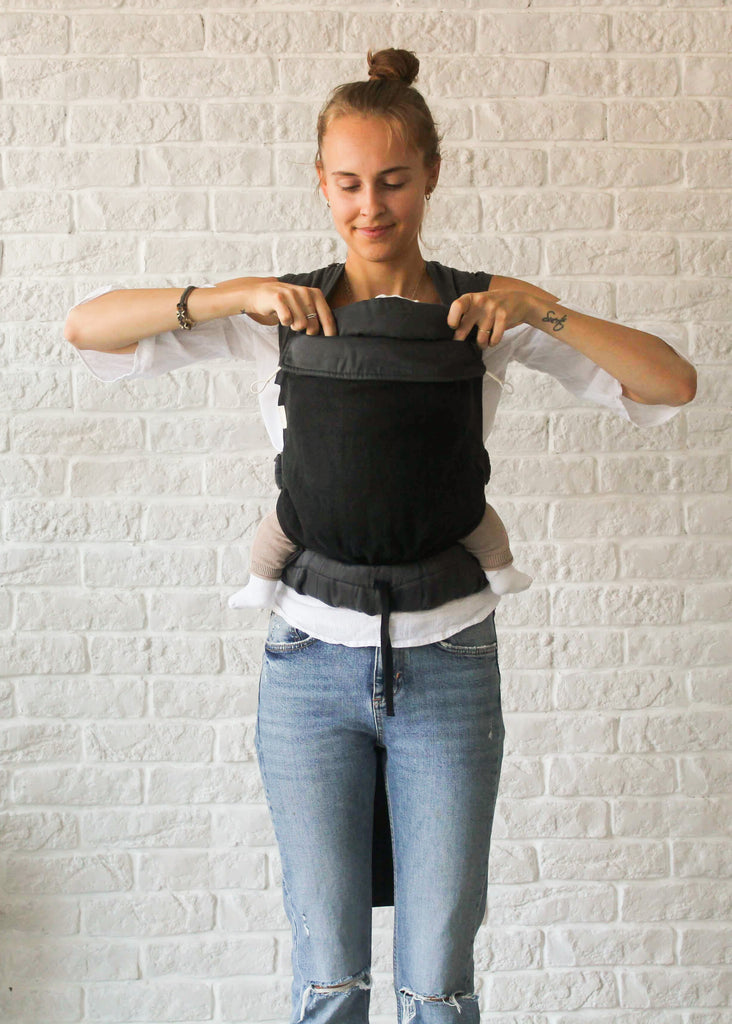
Now fold the back part up.
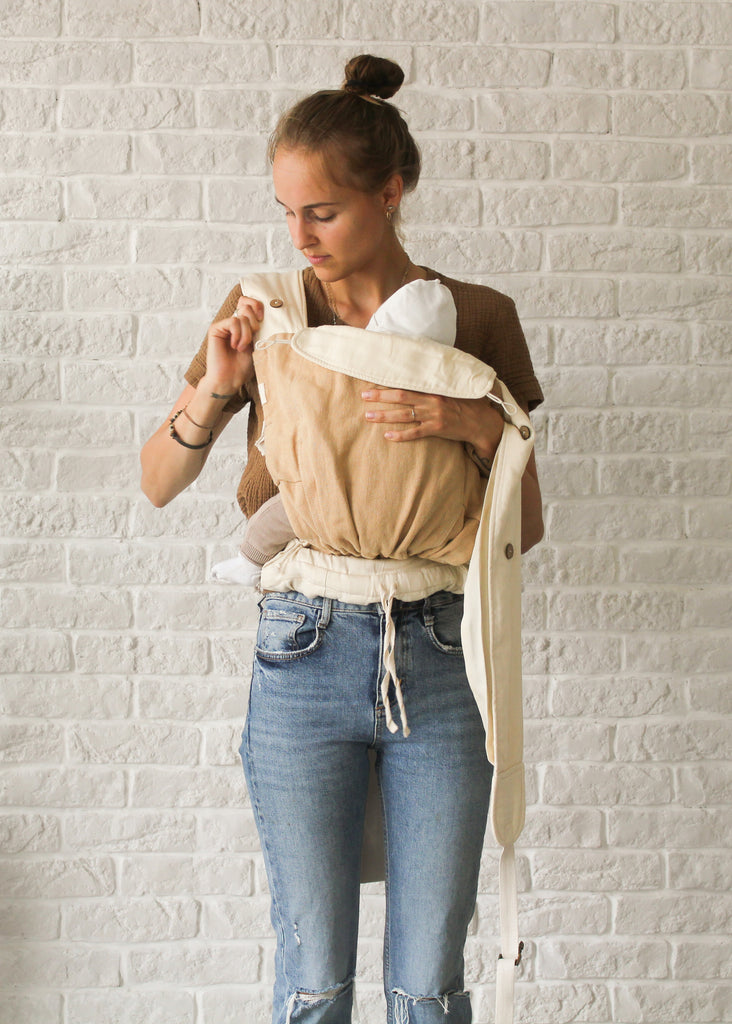
Put the back straps over your shoulders. Always hold your baby with one hand.
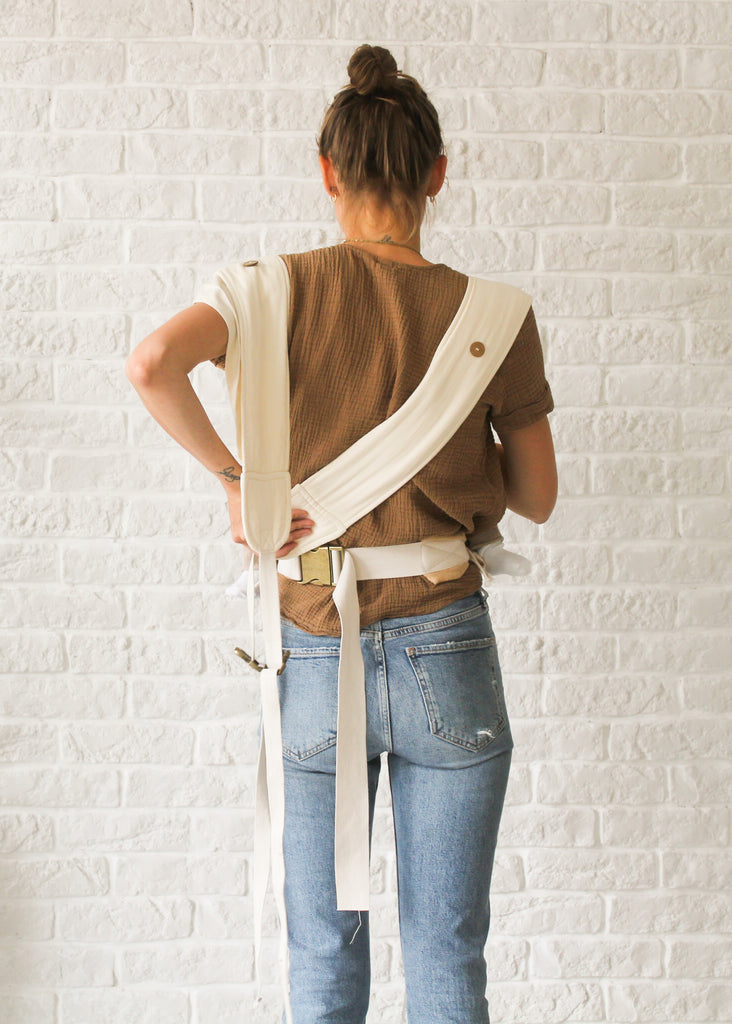
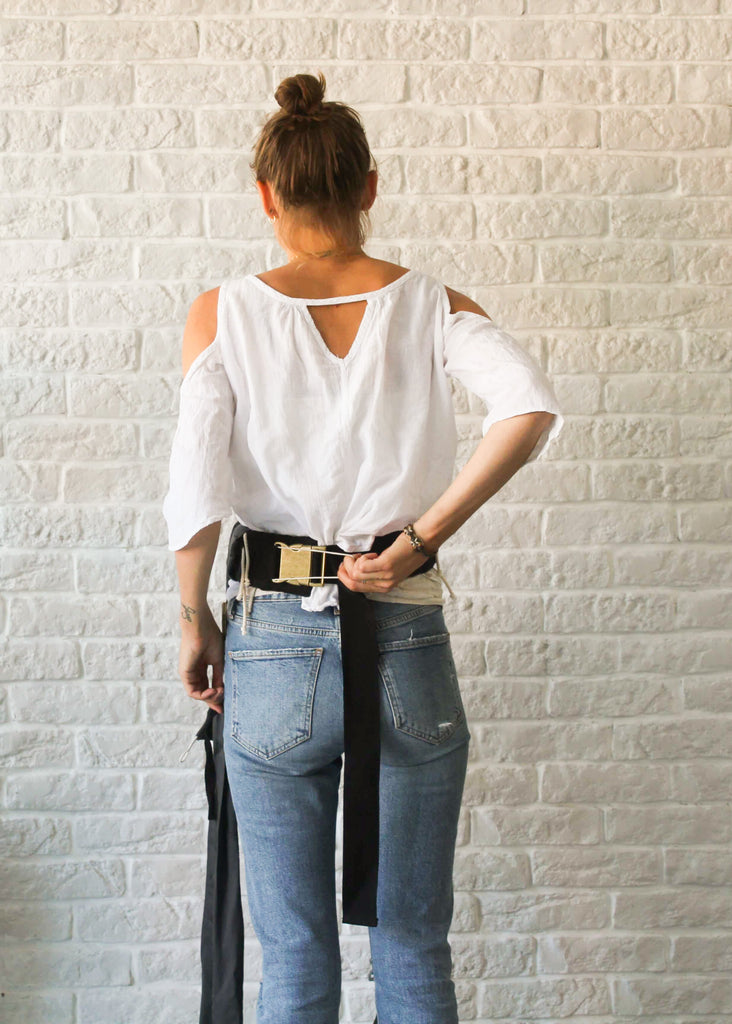
Reach behind your back for the opposite back straps so that the straps cross over your back.
Now attach the buckle to one side and gently pull the straps tightly. Repeat the process on the other side.

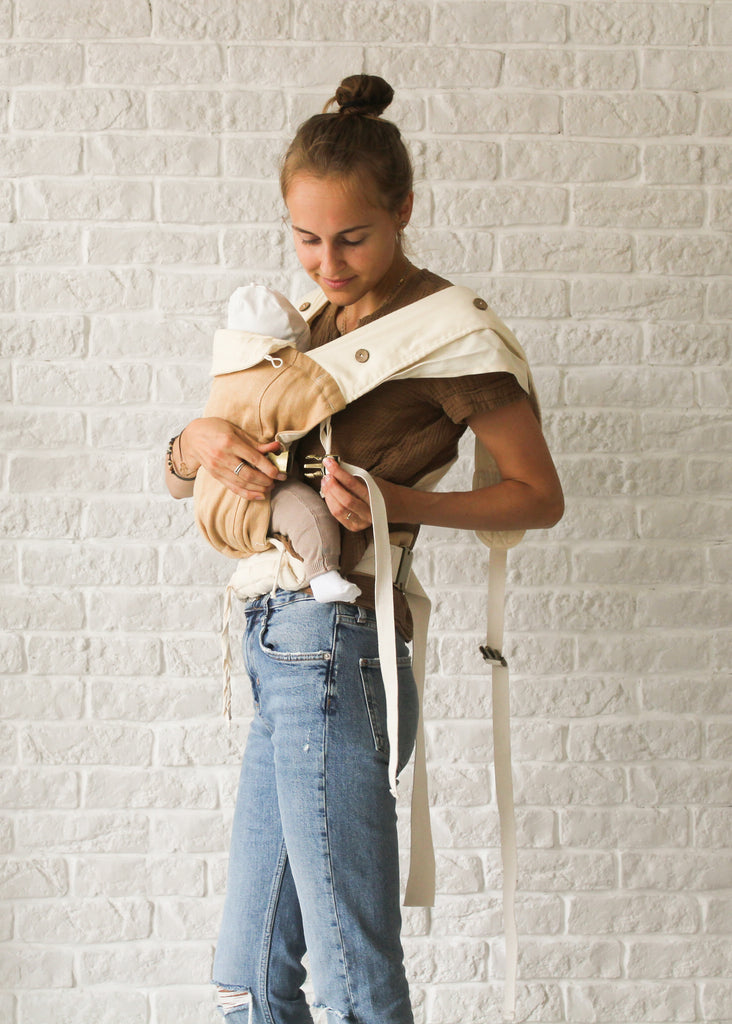
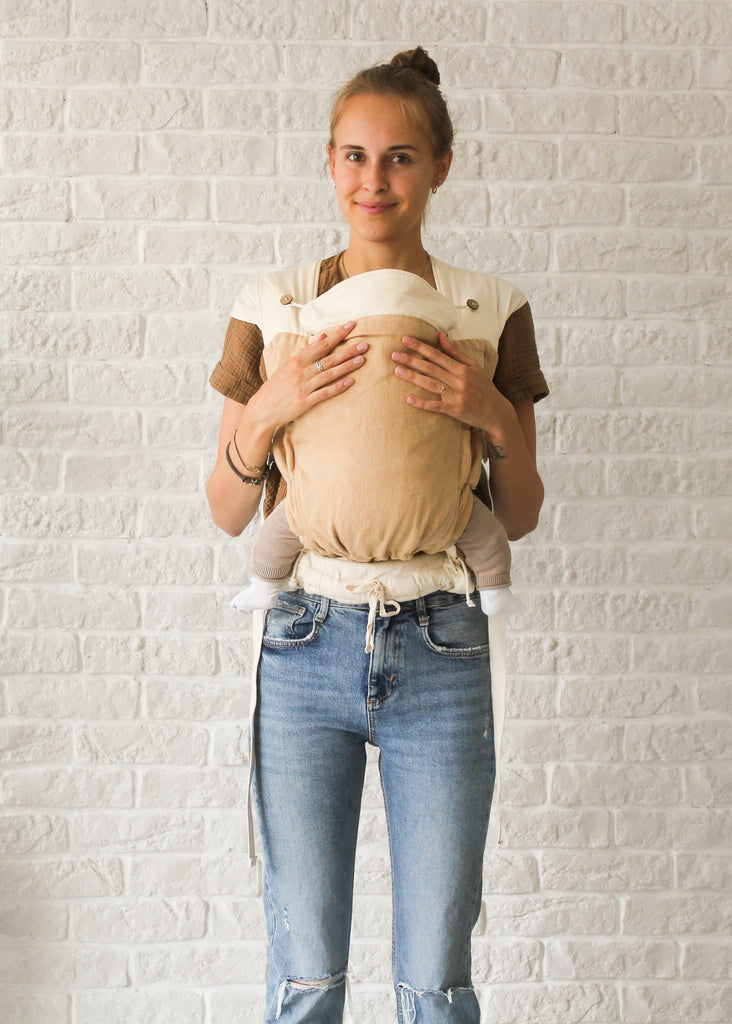
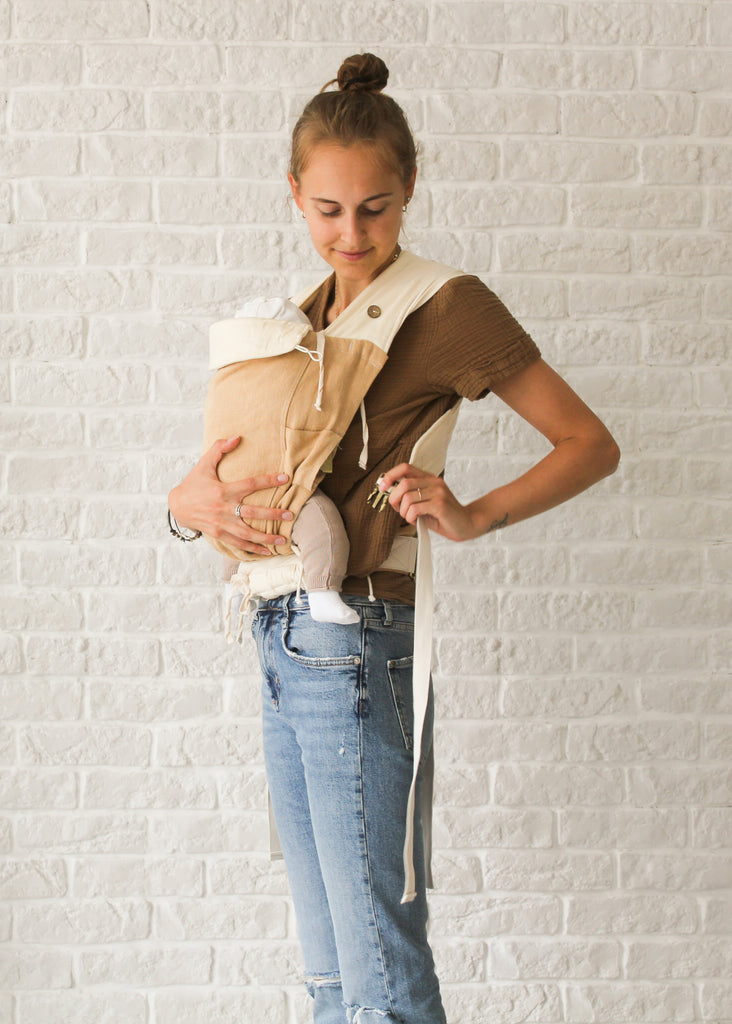
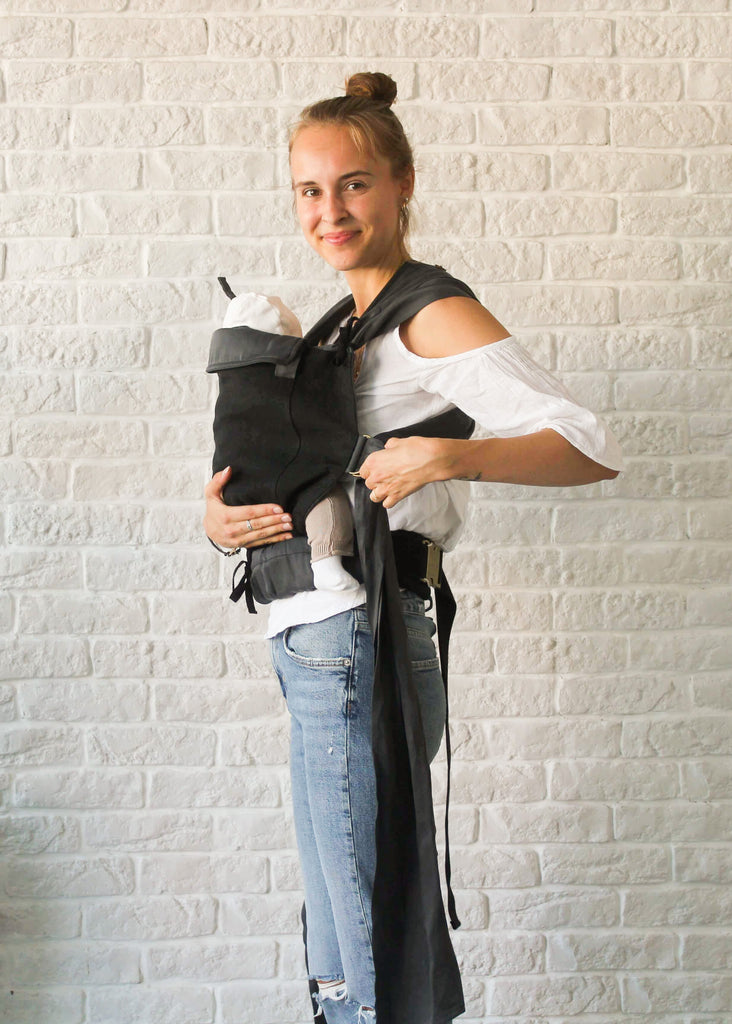
Now you can pull the belt a little tighter so that your baby sits close to your upper body in the baby carrier. To do this, pull loose material from the back strap to the front and then tighten the loose end of the straps.
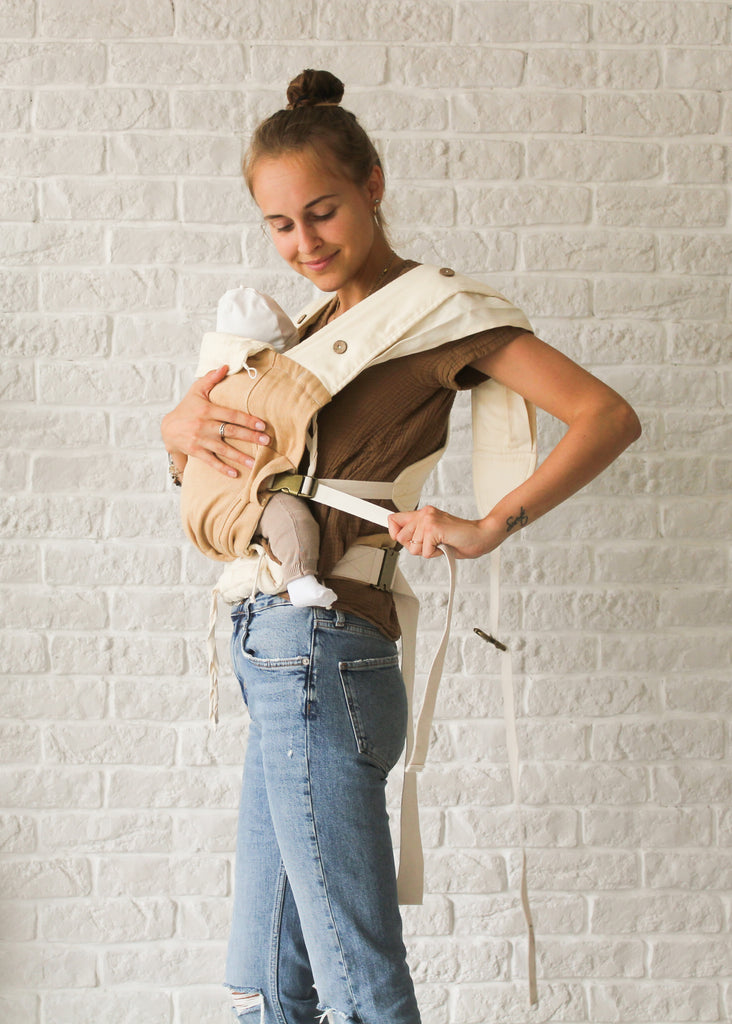
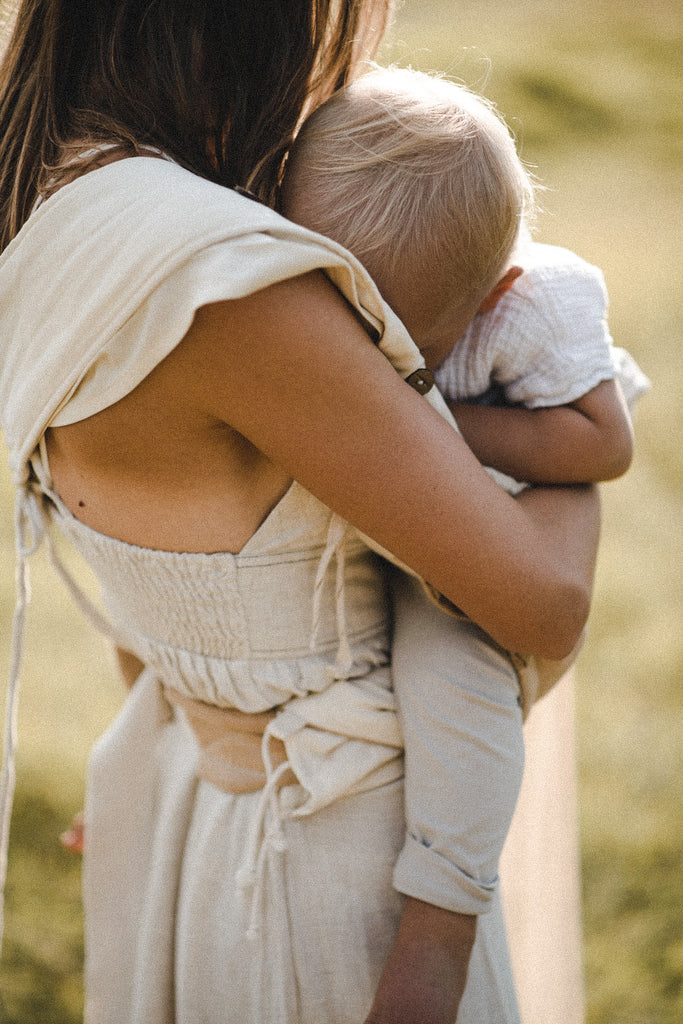
From the height, your baby should be seated so that you can kiss him on the head. Then pull the safety rubber over both buckles.
You can now fan out the shoulder straps if you like.
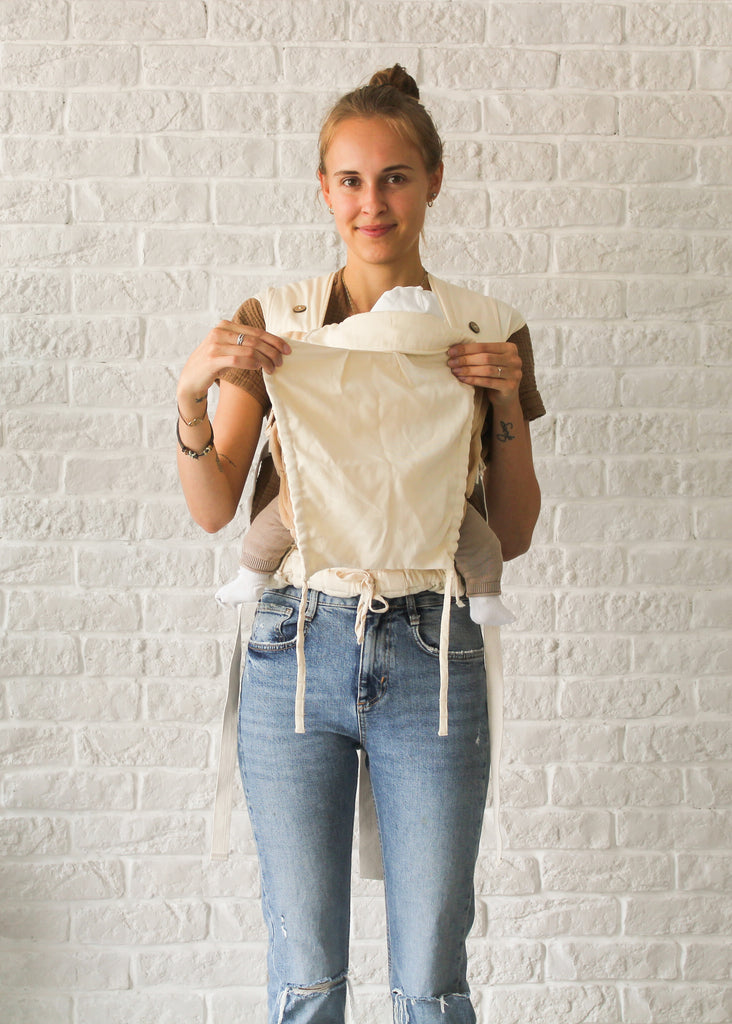
If necessary, e.g. when your baby is sleeping, you can also attach the small headrest with the elastic in the lower buttons.
If necessary, adjust the leg opening and check the M-position of the legs.
The large detachable headrest or sun protection can be gathered up as required and attached to the back buttons using the loops.
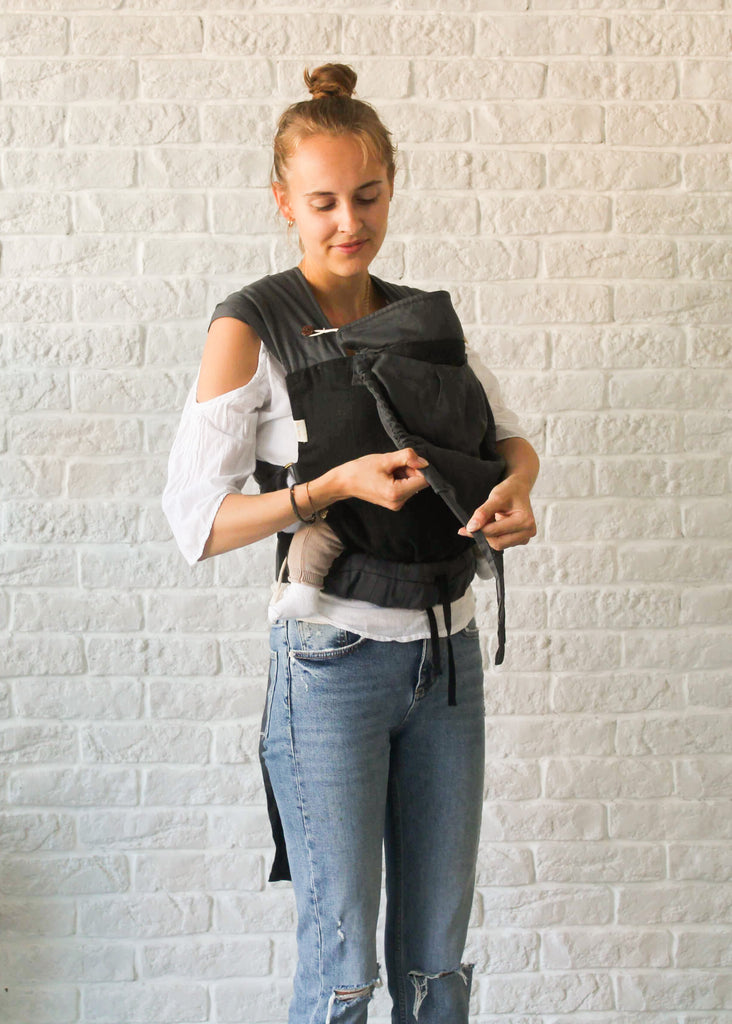
You can apply these settings to your newborn as needed.
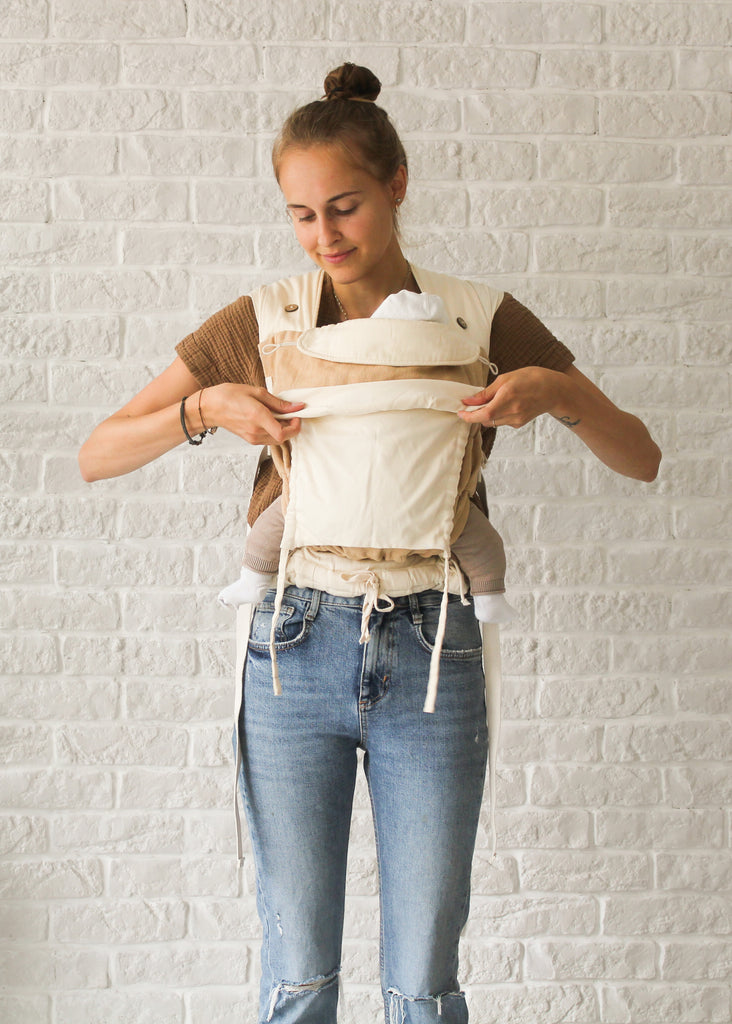
The detachable headrest is particularly suitable for newborns as it provides extra padding for the neck area.
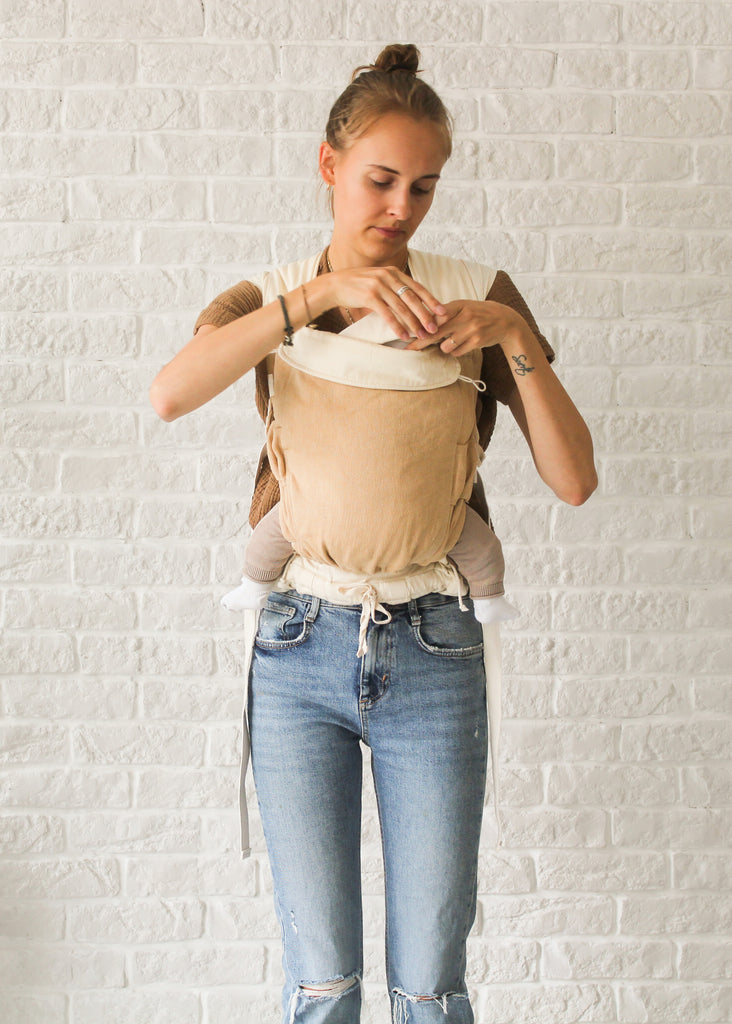
Roll this up and stow it in the integrated inside pocket.
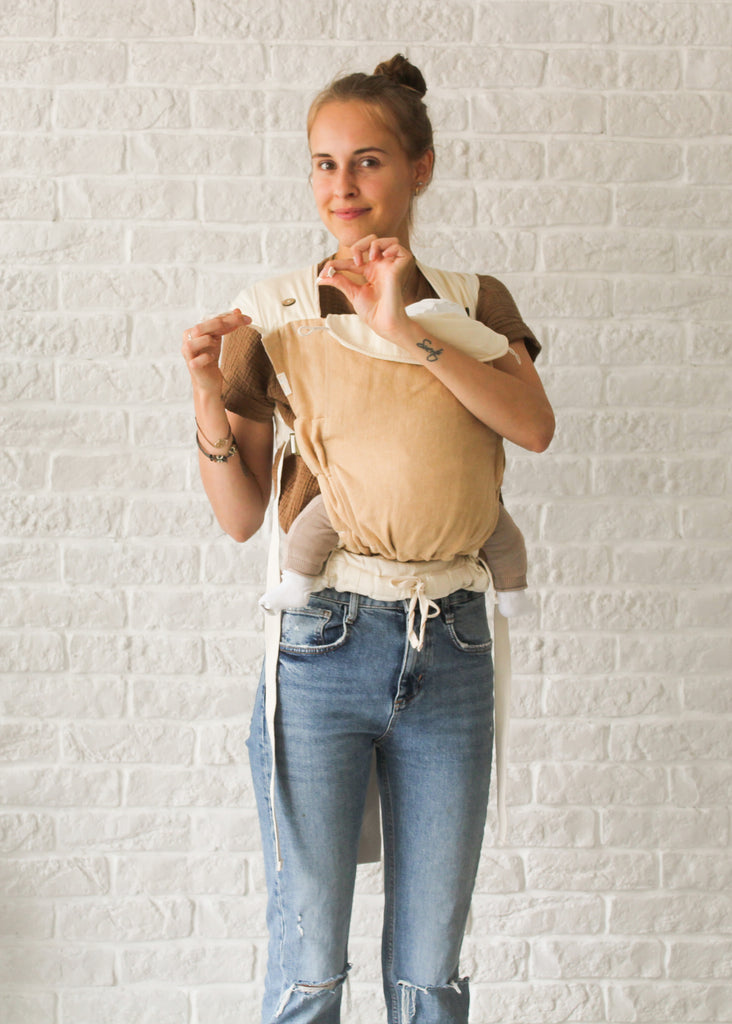
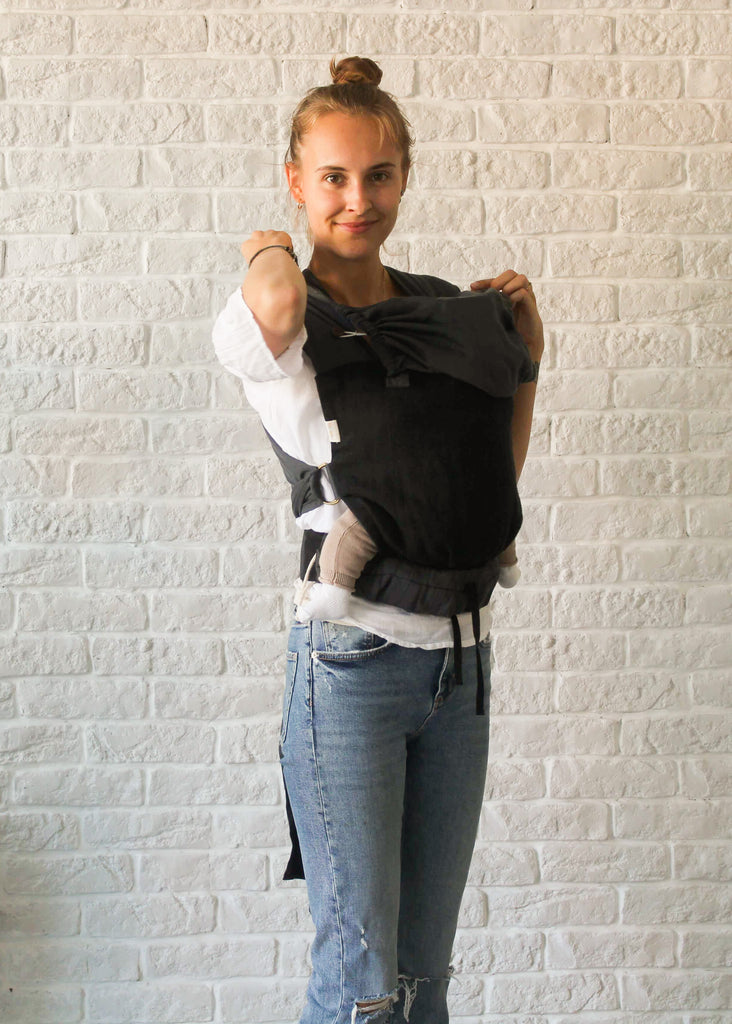
To give the neck area extra support for small babies, you can tie the side straps, which are incorporated on the inside of the shoulder straps, tightly together at the front. This tightens the neck area again and gives more support.
You can also use this when your baby sleeps with his head on its side, so that more fresh air can pass between the straps.

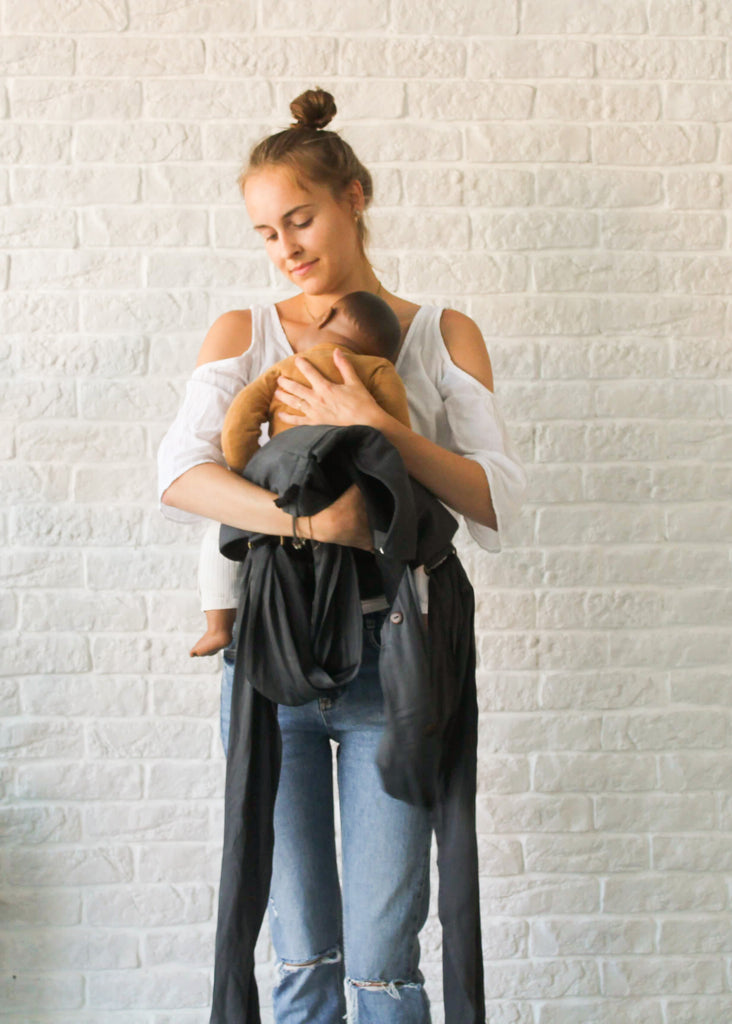
This is how you can put your baby down safely after using your baby carrier :)
Remove the safety strap and open the buckle. Repeat for the other side.
Now you can bring the straps forward. Always keep one hand on your baby while doing this.
Fold the back section down and put your baby down safely. The very last thing you can do is open the hip belt and take off the stretcher.
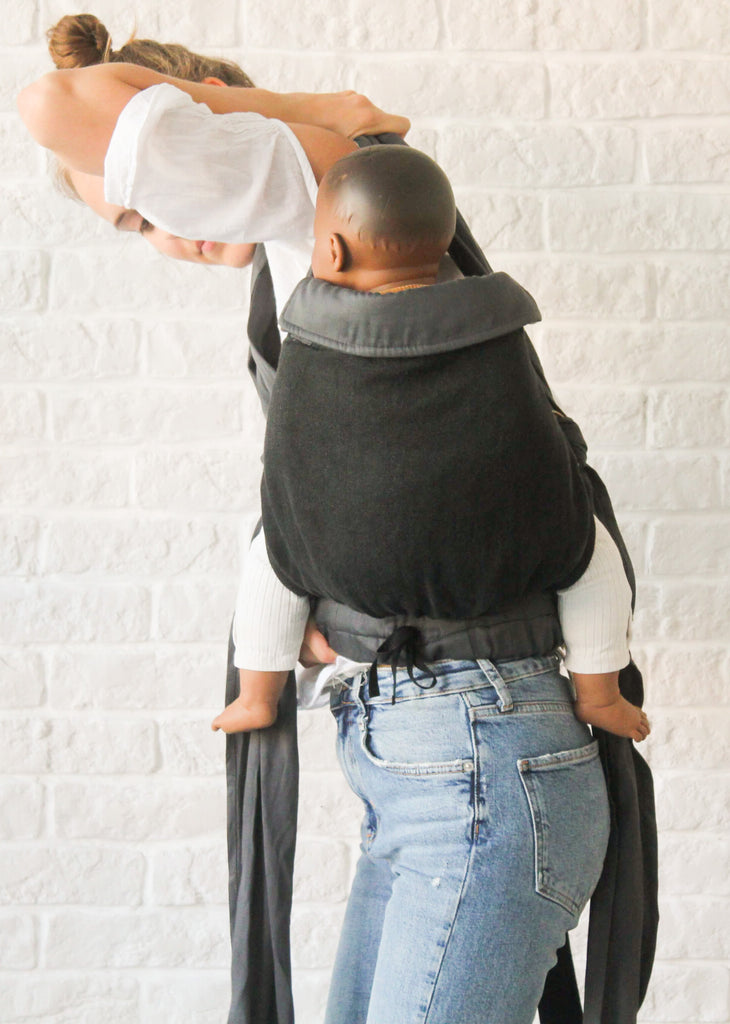
Step by Step... Carry on the back

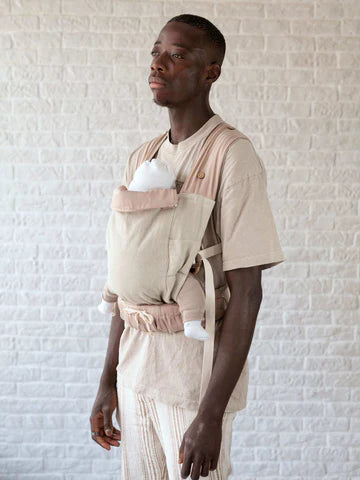
Here we show you step by step how to put on our Full Buckle Carrier by yourself using the Back Carry Set :)
Place the baby carrier on your hips with the buckle facing forward. Have the back carry pad ready.
Now thread the backpack pad with both ends of the hip belt through the respective loop.

The buckles on the pad point outwards.
Now close the buckle on the hip belt. Leave it a little loose so that you can still move it easily. However, you should already pull the safety rubber over the buckle.
Now slide the baby carrier to any side of your hip.
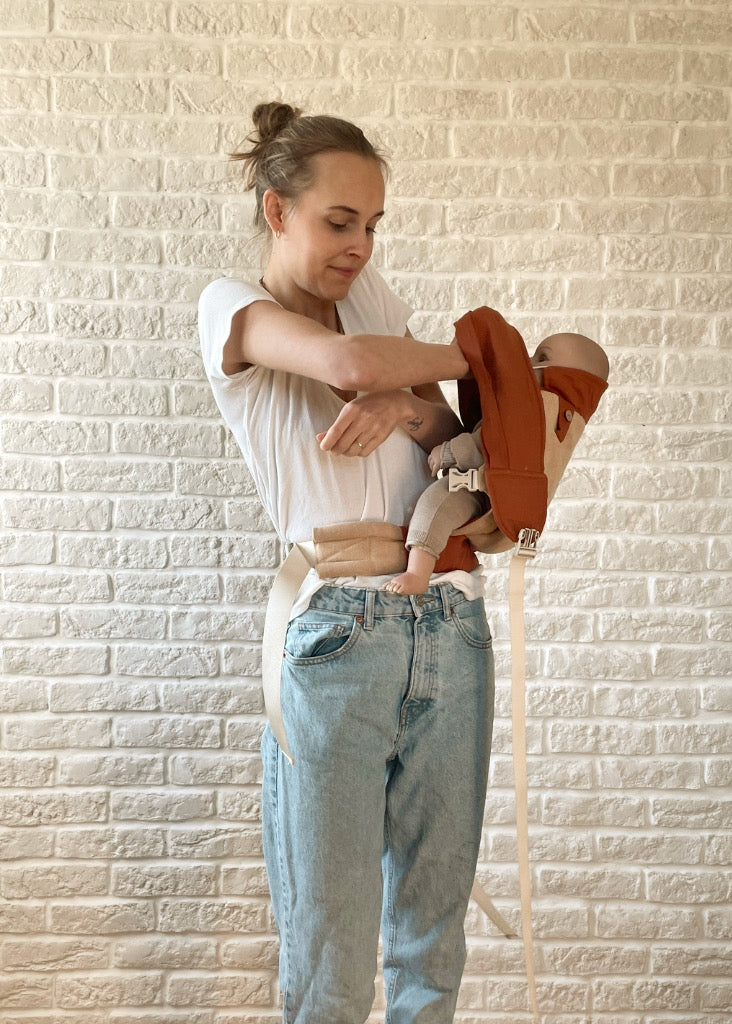
Put your baby on your hip and fold the back part upwards.
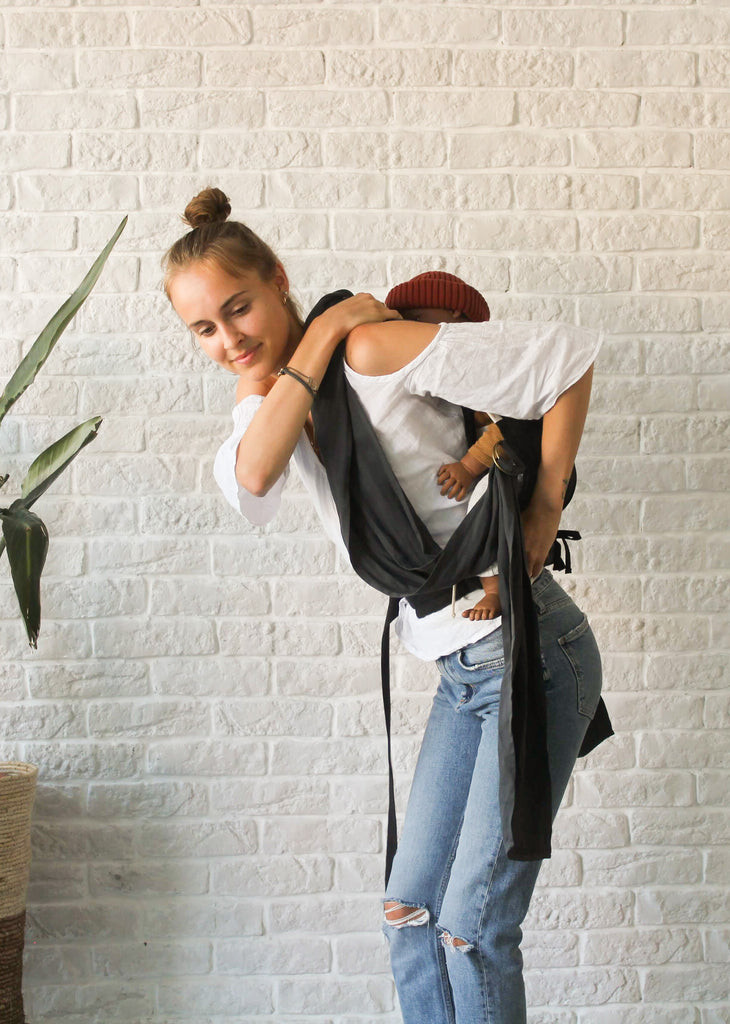
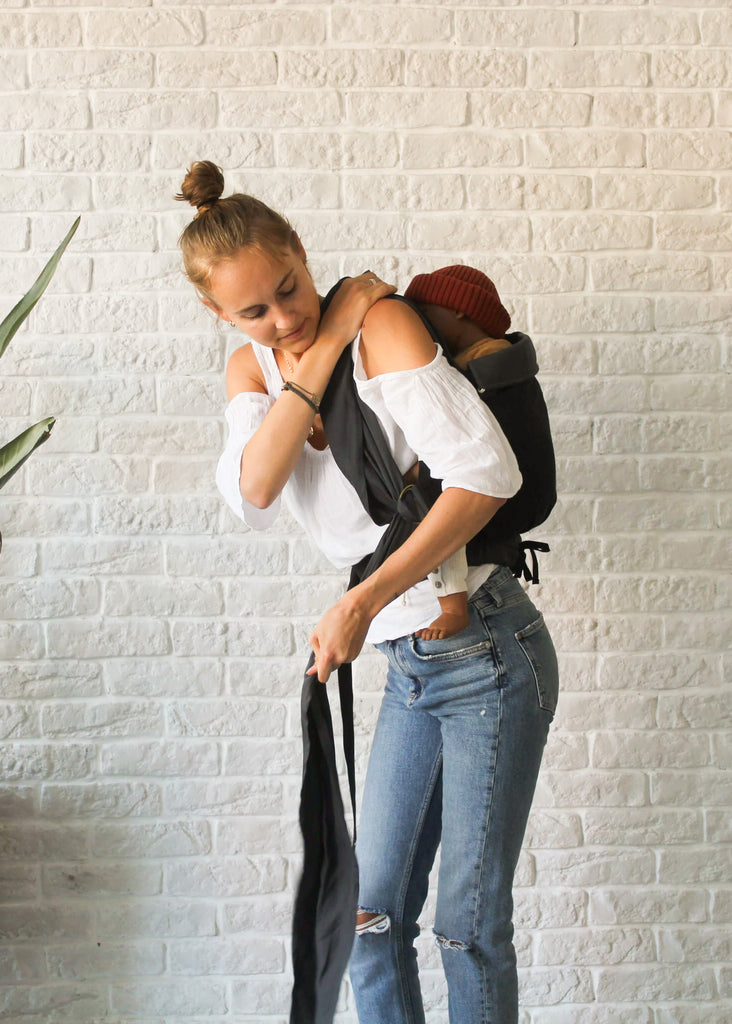
Then grab the straps of the baby carrier (if the baby is sitting on your left side take the straps in your right hand, or the other way around) gather them together in front of your baby's chest to form the secure pouch.
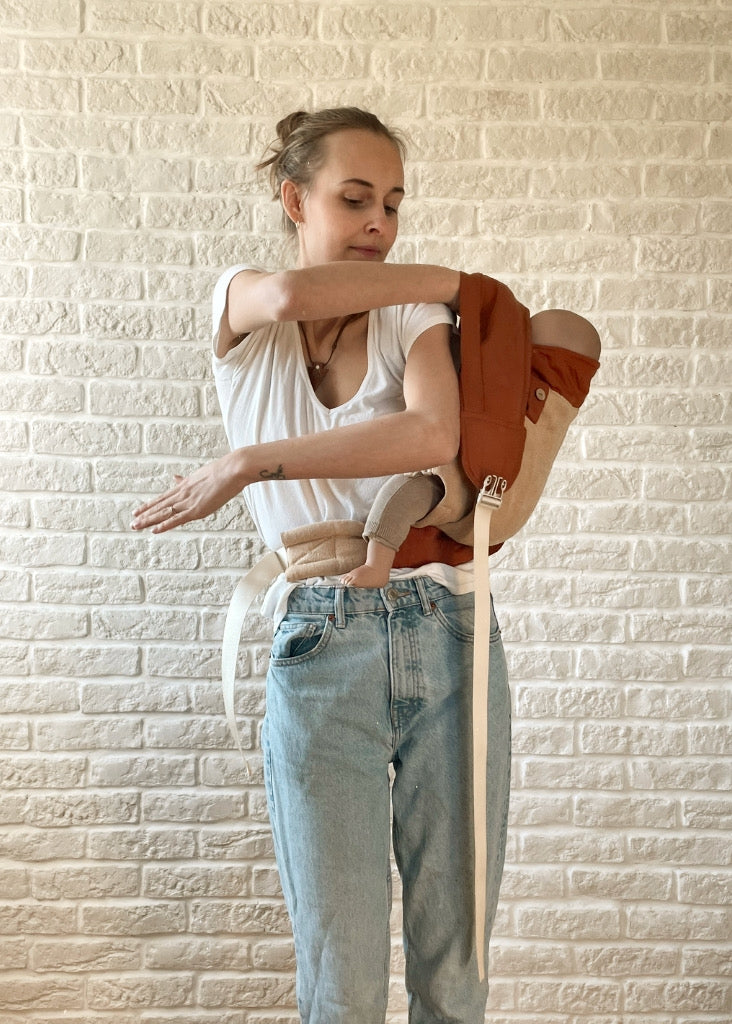
Now slide your free arm forward underneath the straps between your side and the baby's belly.
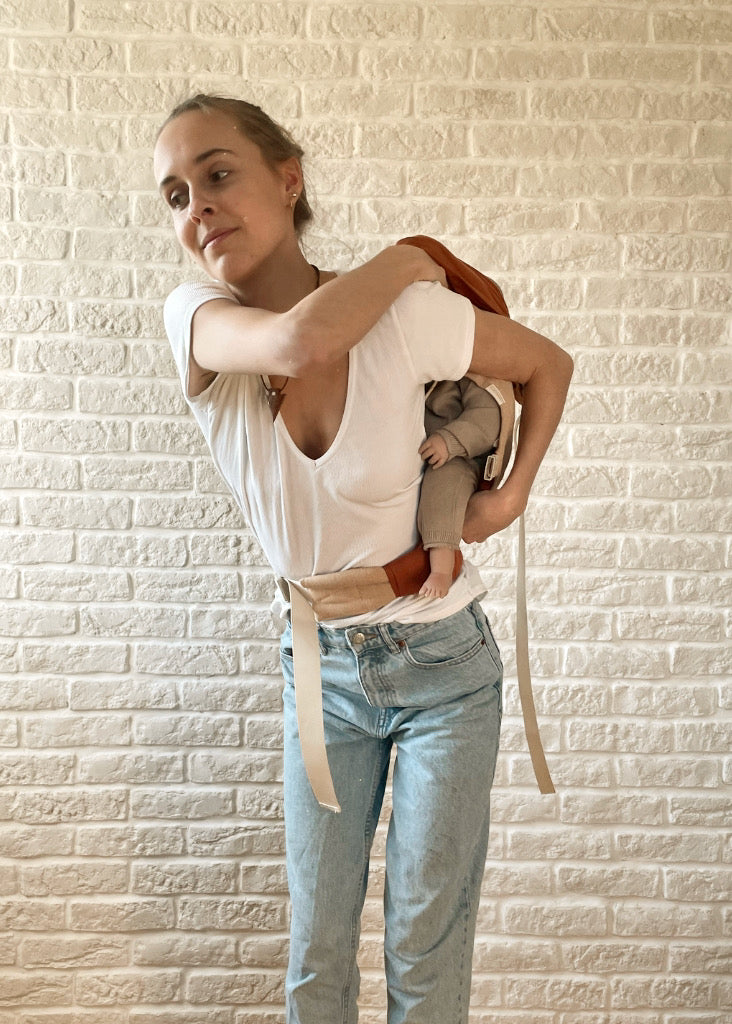
Now you can change hands and, if necessary, use your free hand to pull your baby completely onto your back from the other side.
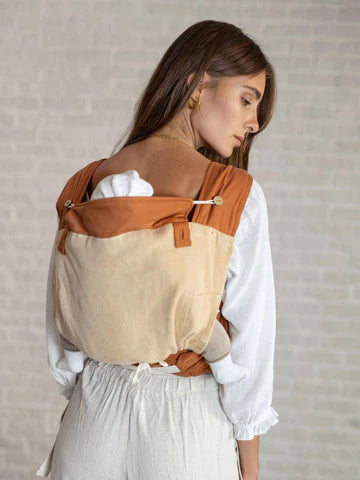
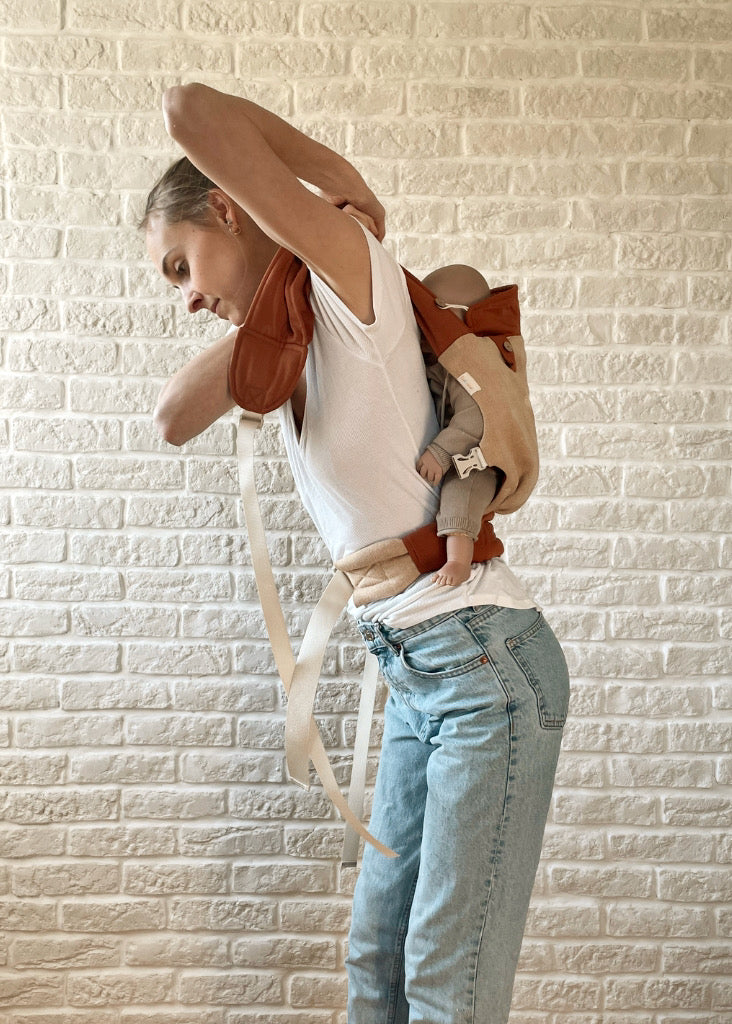
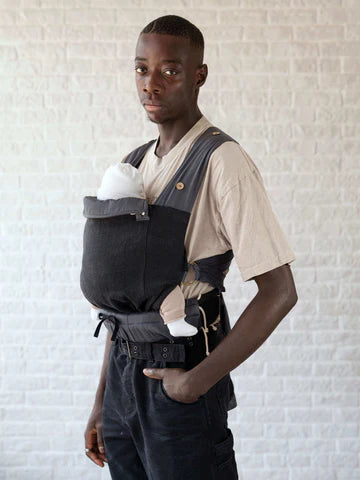
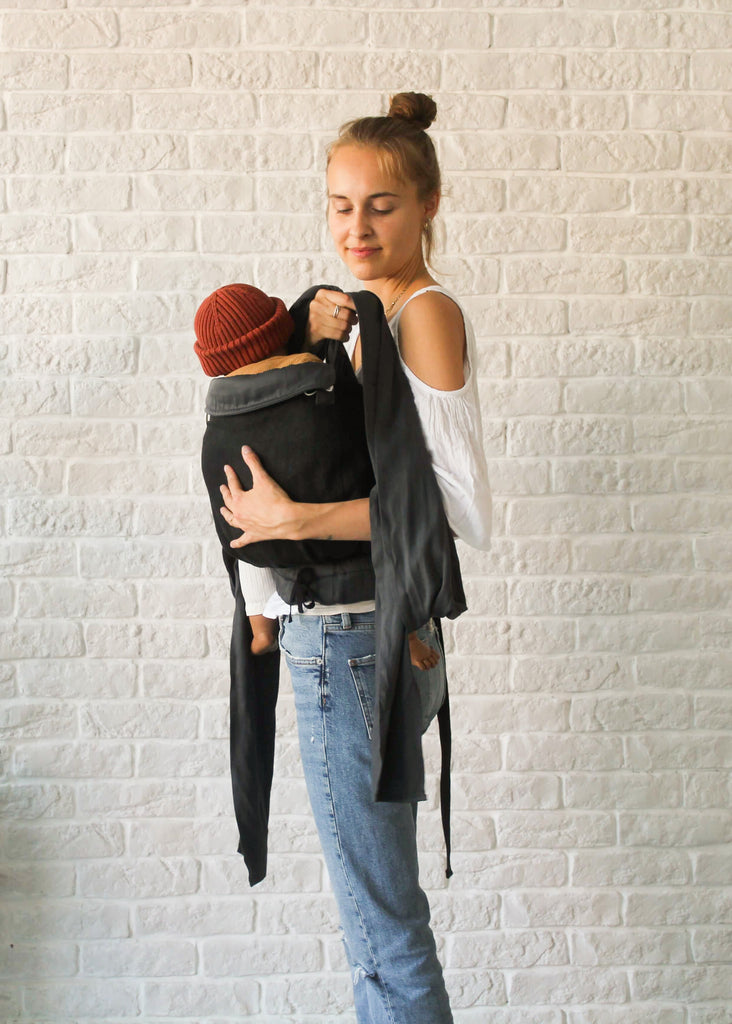
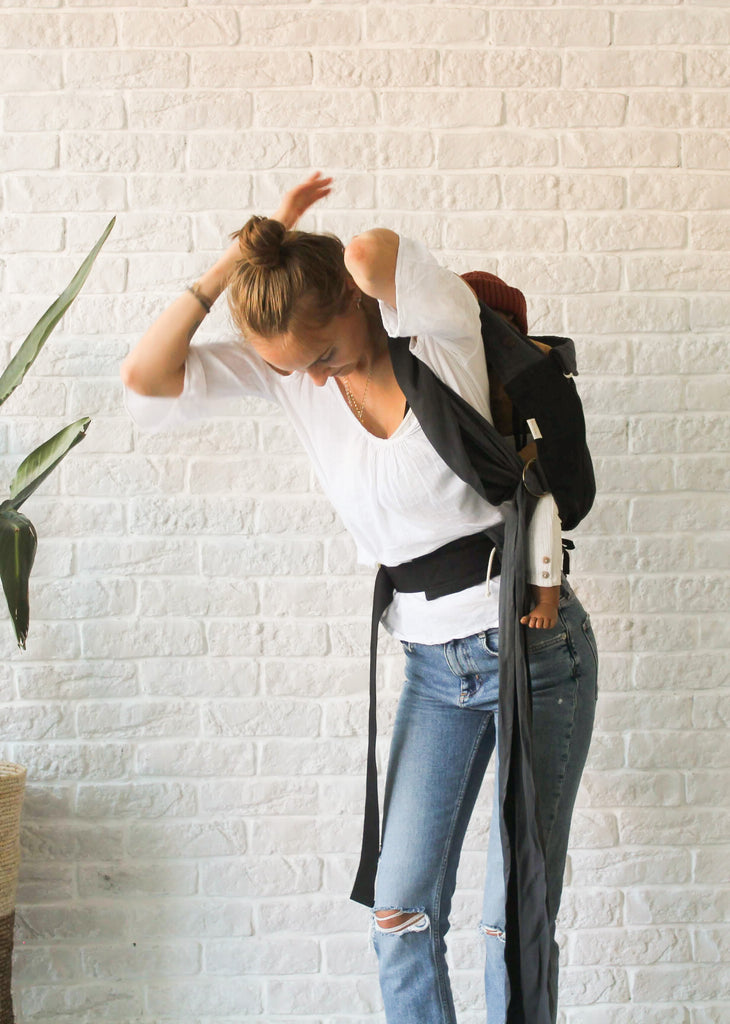
Now bring the straps up over your neck so that you have a strap in each hand. Divide them so that they go over both shoulders. Keep the tension well up so that your baby continues to sit securely.
Now pull the shoulder straps very tight so that your baby is at a good height and not too loose or too low.
If necessary, push the small buckles of the straps to the very end. Of course, you can also do this before putting on.
Always maintain the tension of the straps so that your baby does not slide lower. After a few times practice you will get the hang of it :)

Attach the buckles to the corresponding end pieces of your back support pad, tighten them and attach the safety rubbers here as well. If necessary, you can also tighten the hip belt again.
If your baby is placed too loosely, you can pull down the corresponding strap at a time, bring the loose material forward under the baby's bottom, and then tighten it again.
Step by Step... Wear in front of the belly

Now we will show you the exact steps for putting on the baby carrier every day in detail :)
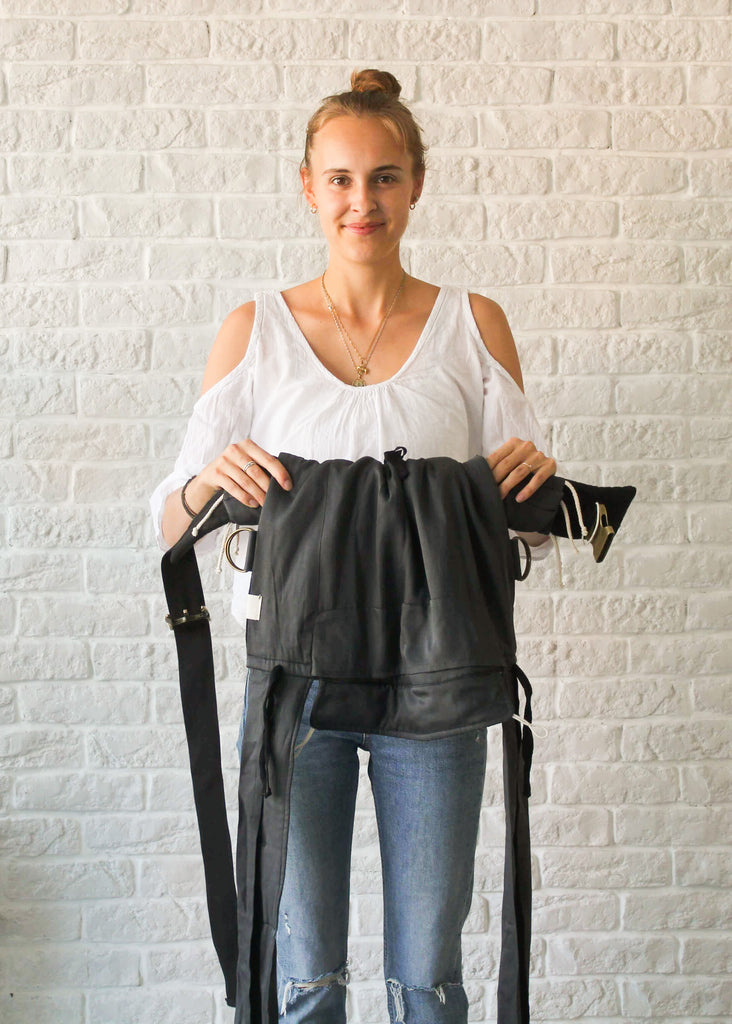
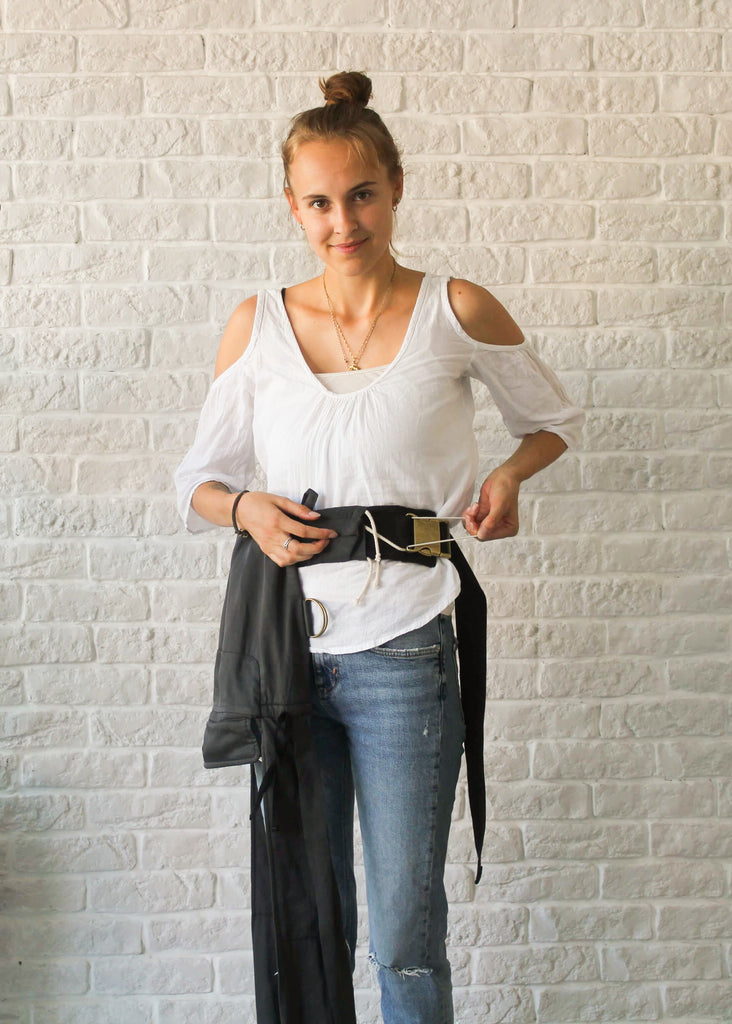
Hold the baby carrier with the label outwards in front of you and turn the waist belt so that the inside is facing your belly. The is our starting position.
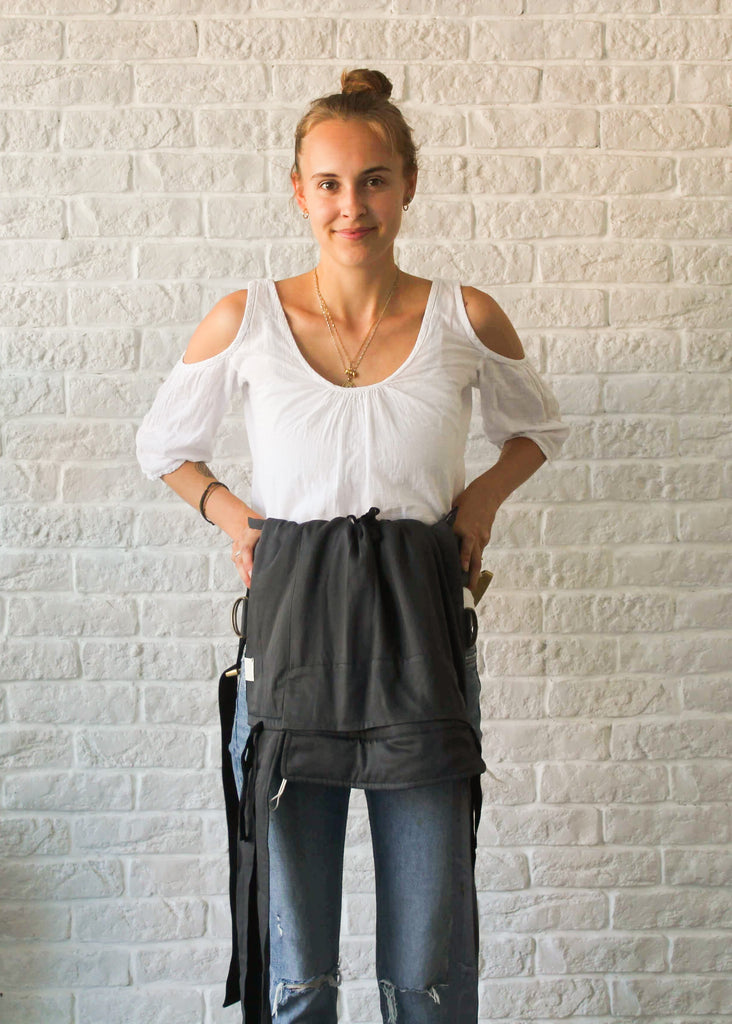
Now position the waist belt of your baby carrier above your hip bones (if it sits nice and high up & tight your hips will catch most of your baby's weight)

Close the buckle, tighten the belt. Note: If the buckle is upside down, you can simply unthread it and rethread it the right way around (first from the bottom through the 1st slot, then from the top through the 2nd slot).
Now pull the safety rubber over the buckle.
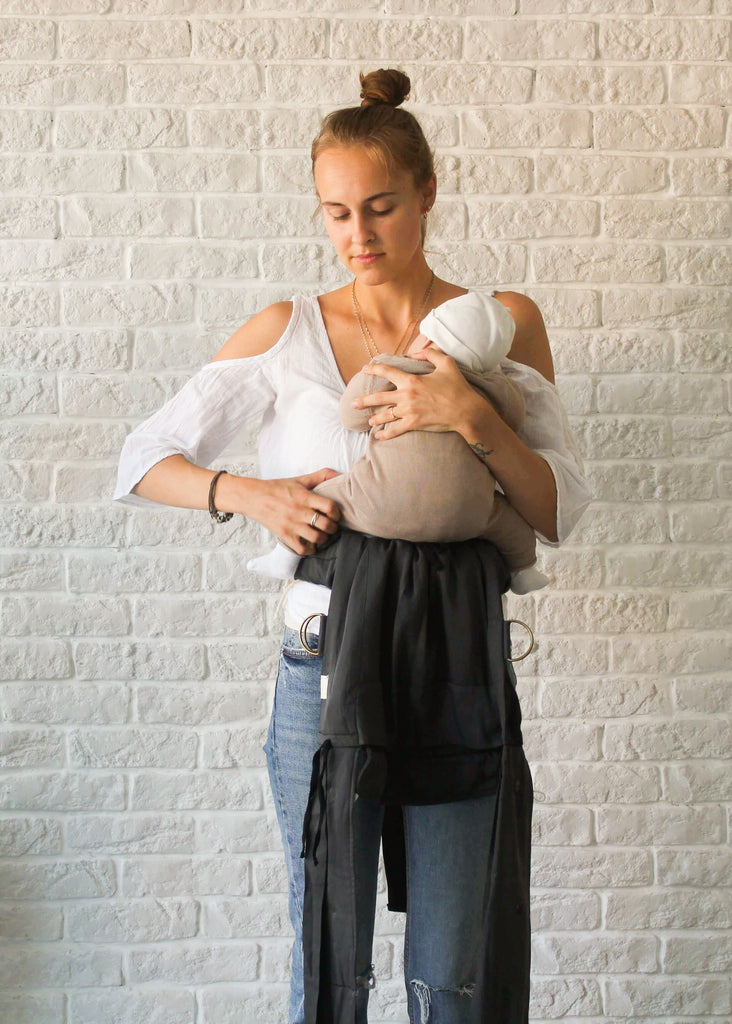
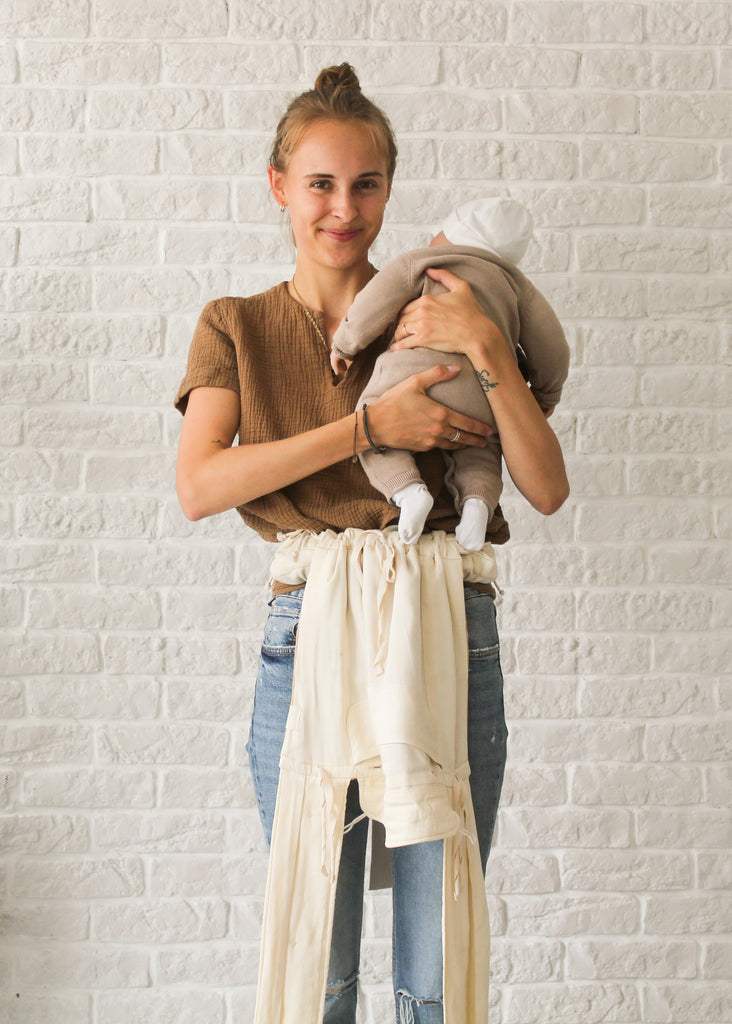
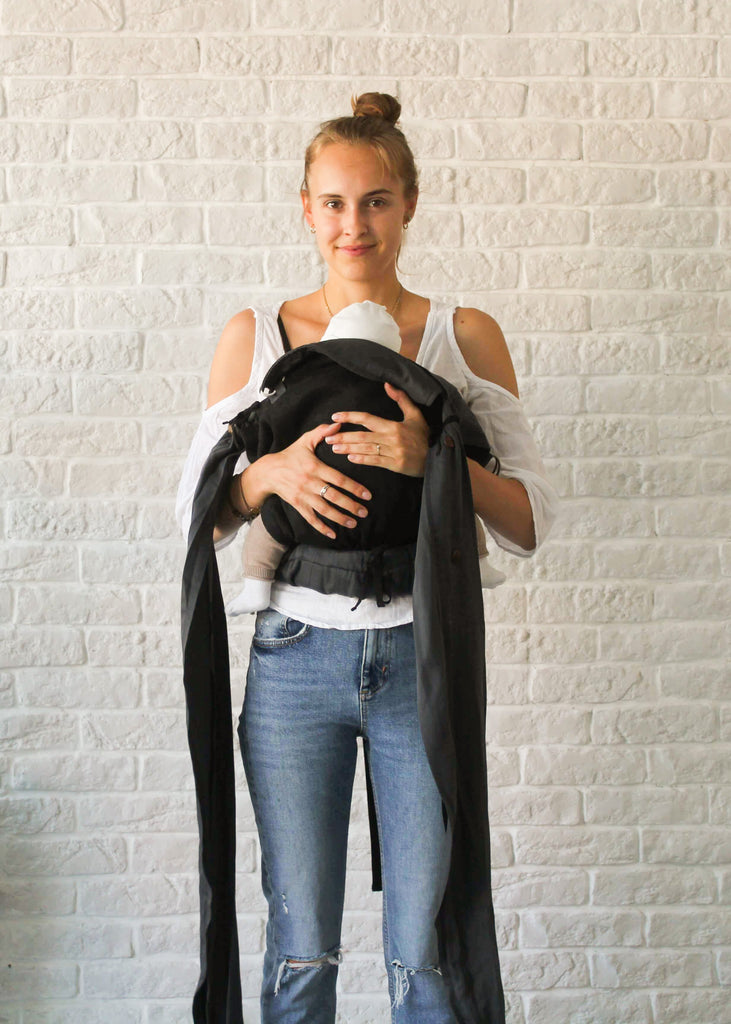
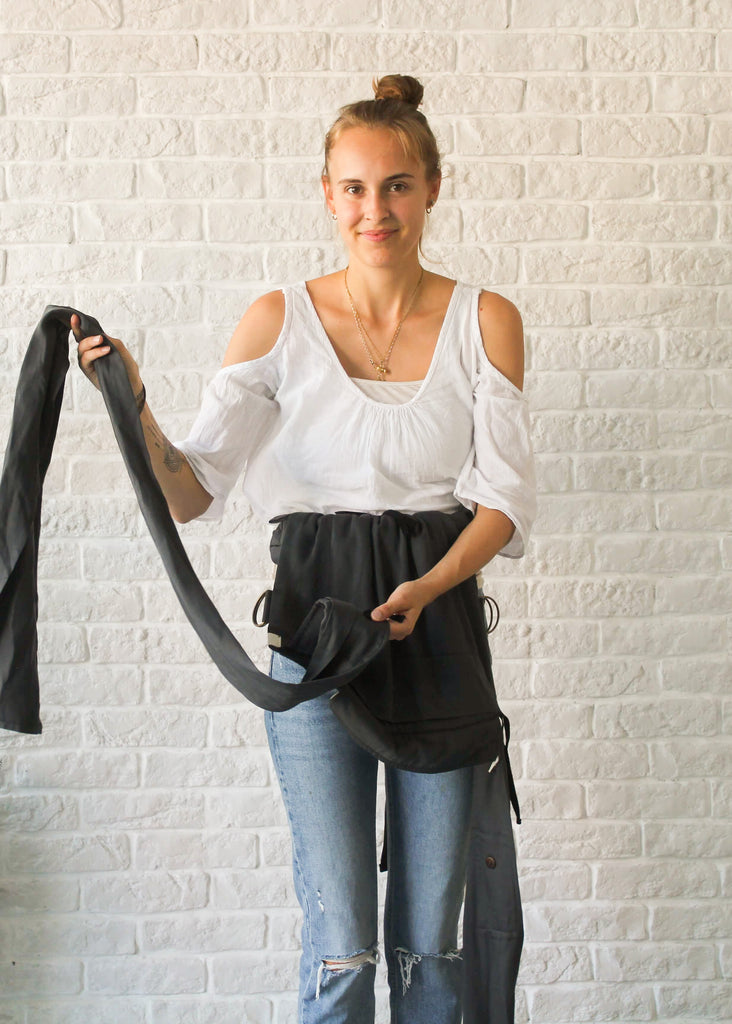
Sit your baby on your hips. Your baby's sitting position should look like an "M" (from feet to butt center and back again).
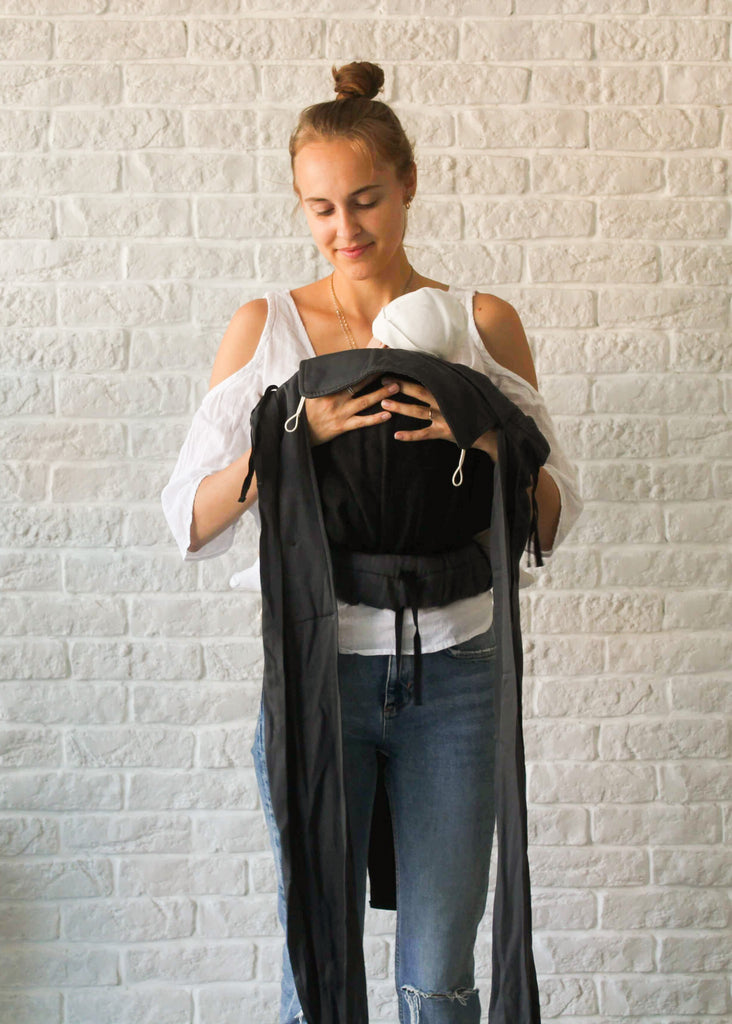
Now fold the back part upwards.
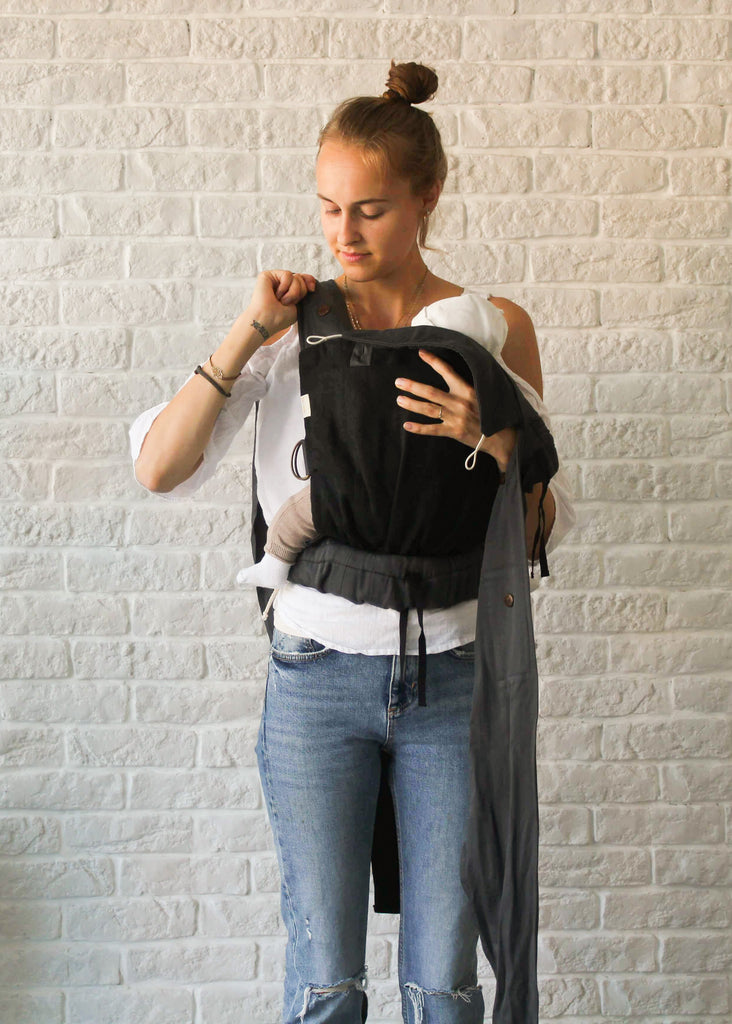
Put the back straps over your shoulders. Always hold your baby with your other hand.
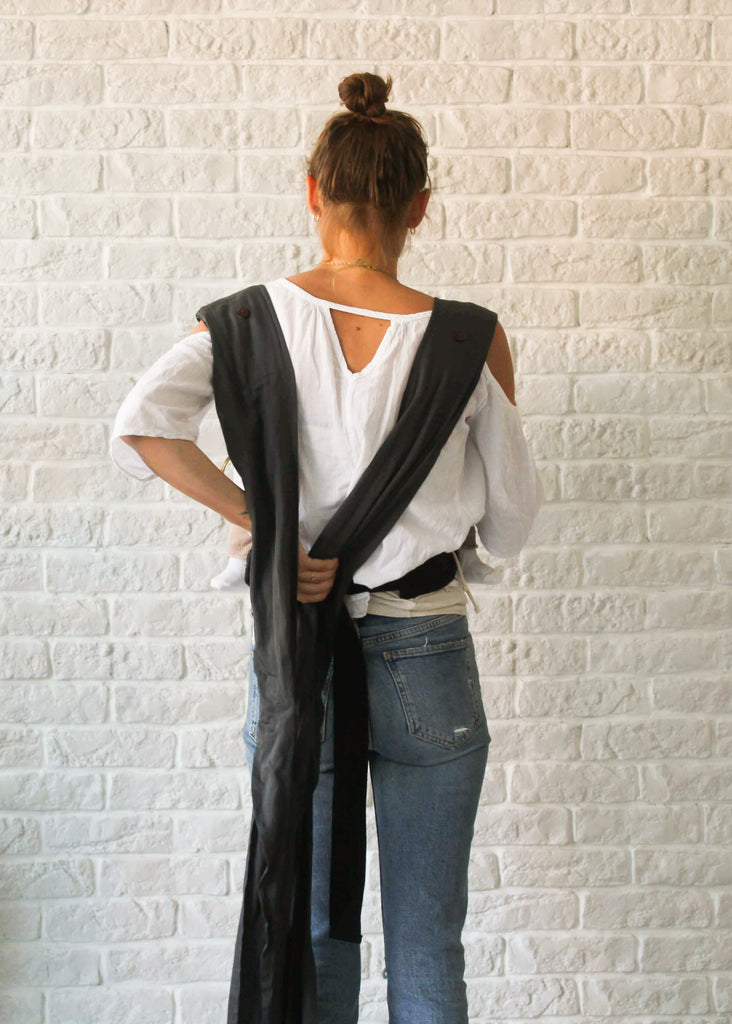
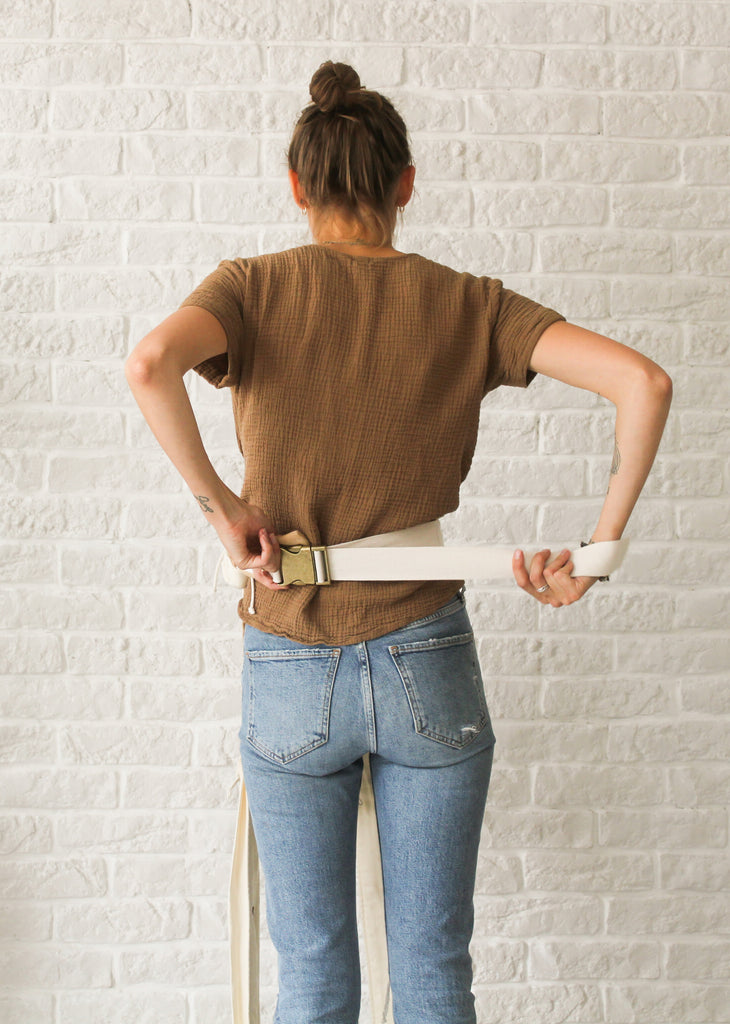
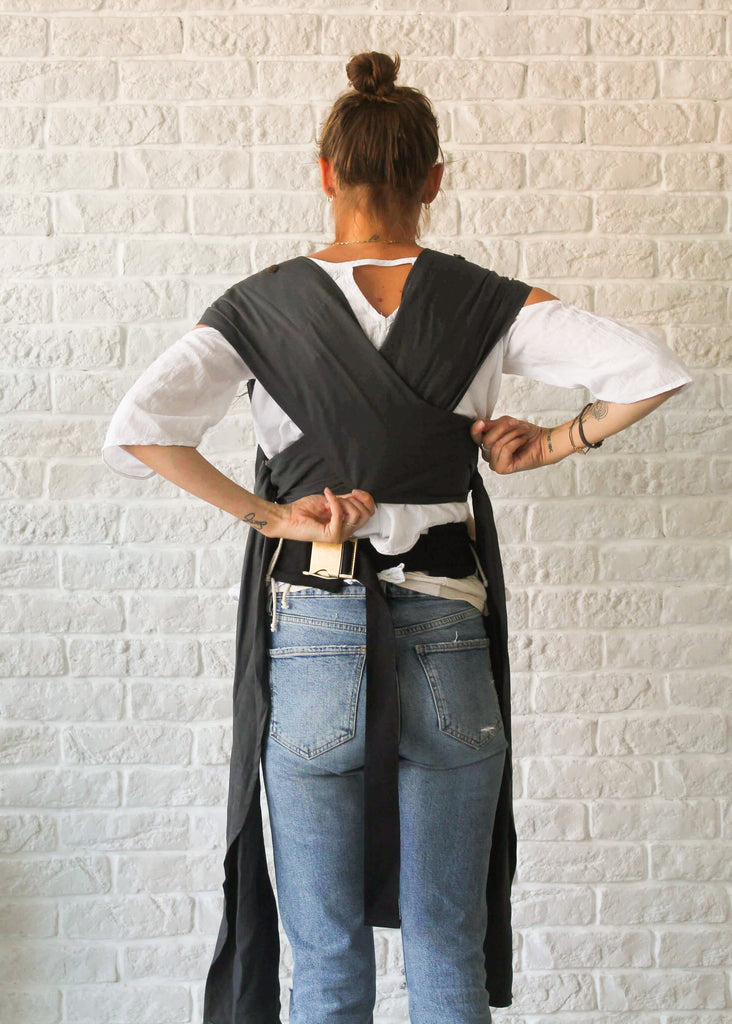
Reach behind your back for the opposite back strap so that the straps cross over your back.
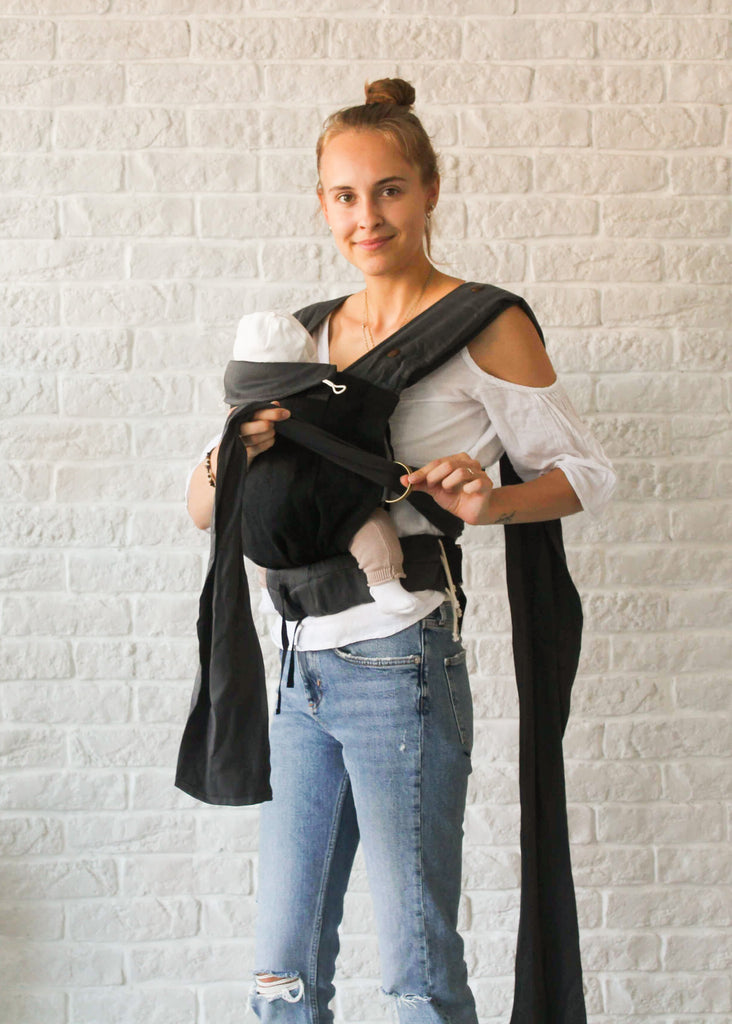
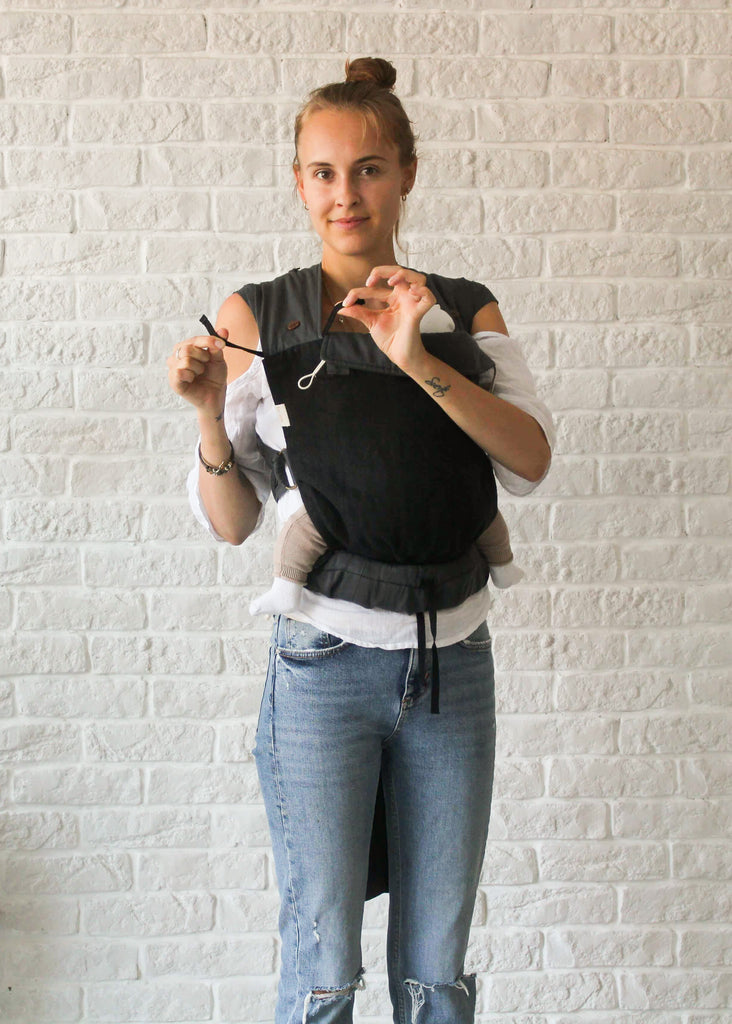
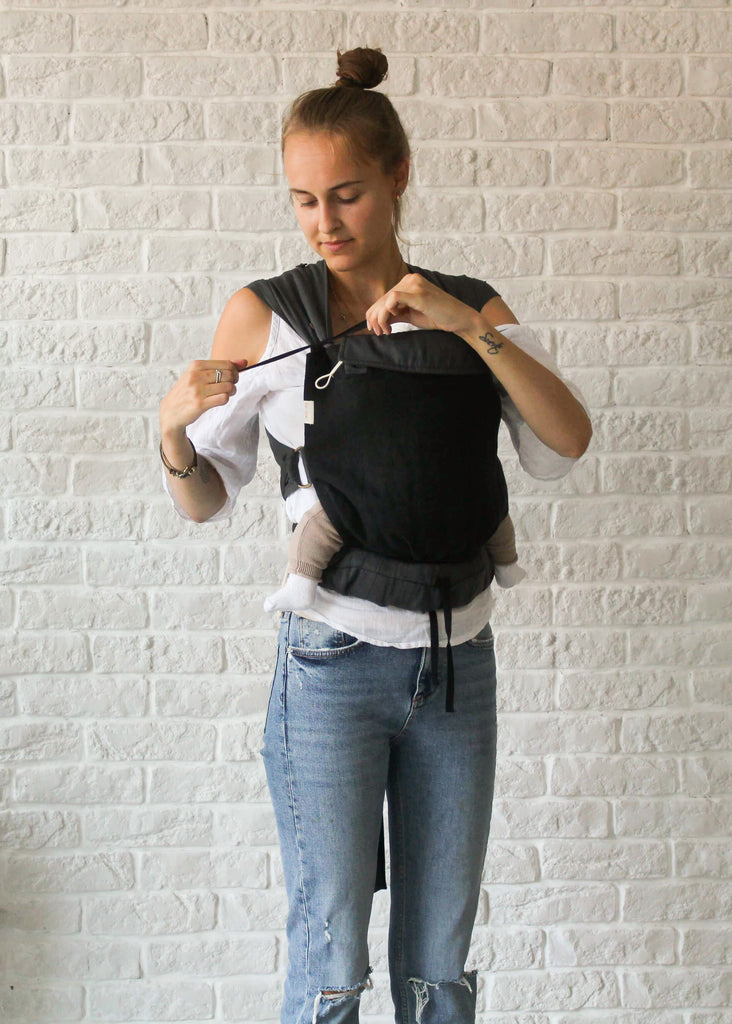
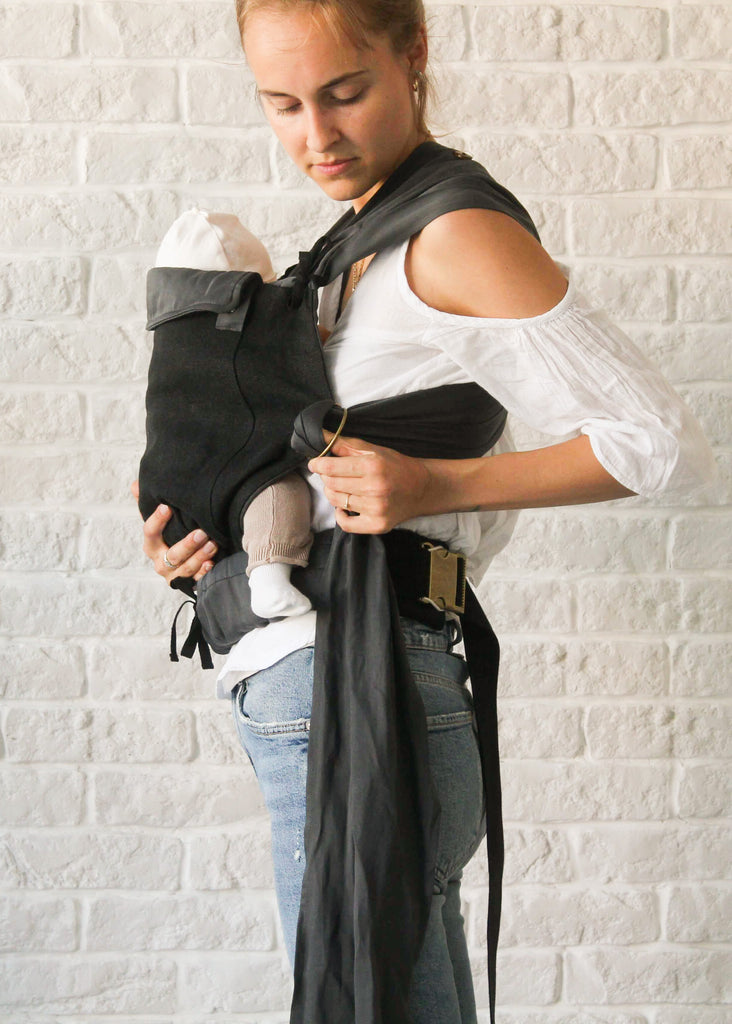
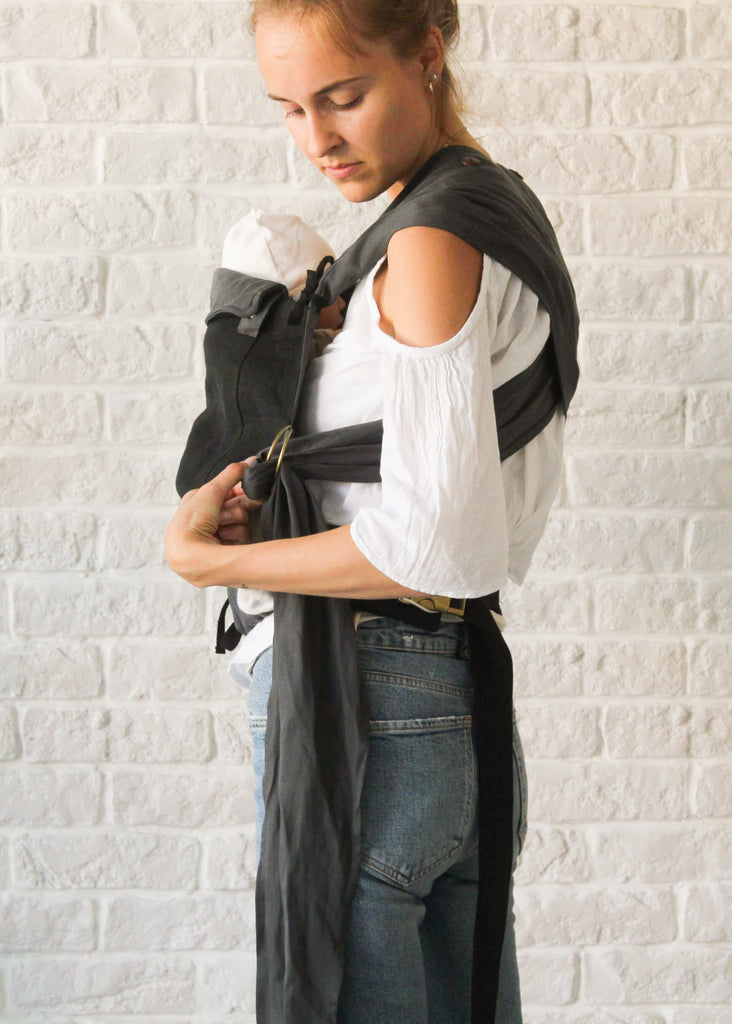
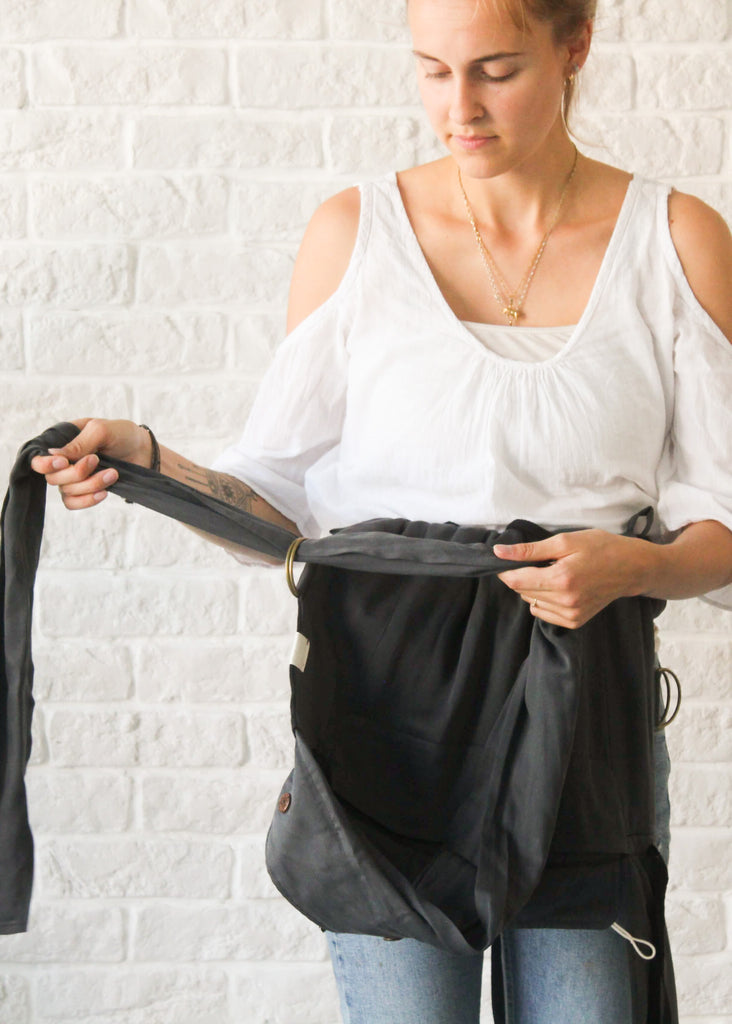
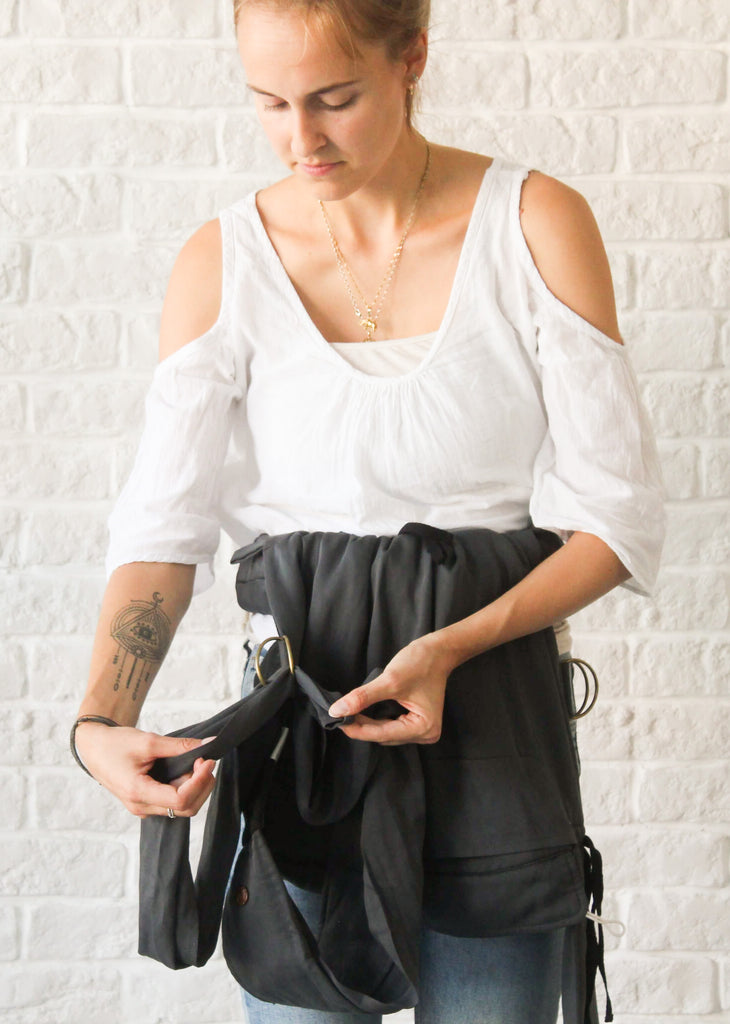
Now thread the cloth through both rings, starting with the ring closest to the inside of your carrier.

Then unfold the rings and thread the cloth again only through the inner ring we started with in the first step.

Now pull the end of the cloth back until it is tight. Repeat on the other side.
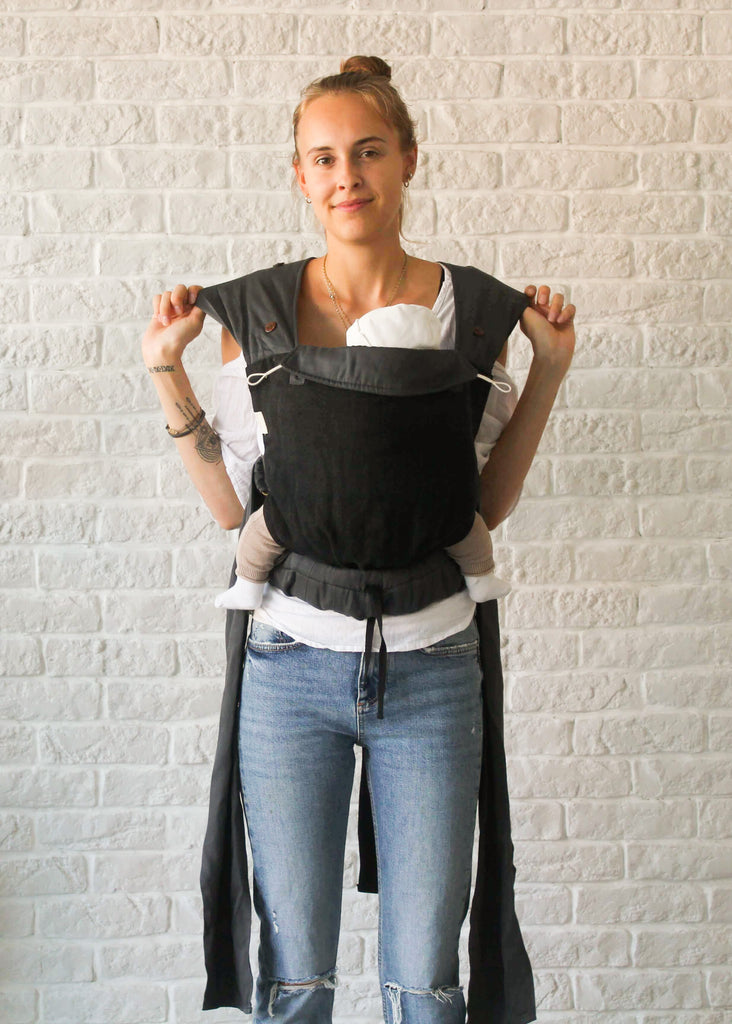
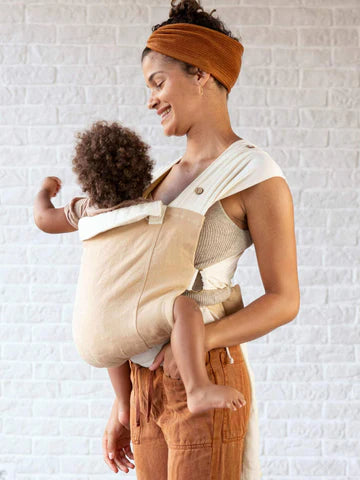
If you like, you can now fan out the shoulder straps.
Pull the ribbons at the back and so that they are nicely fanned out.
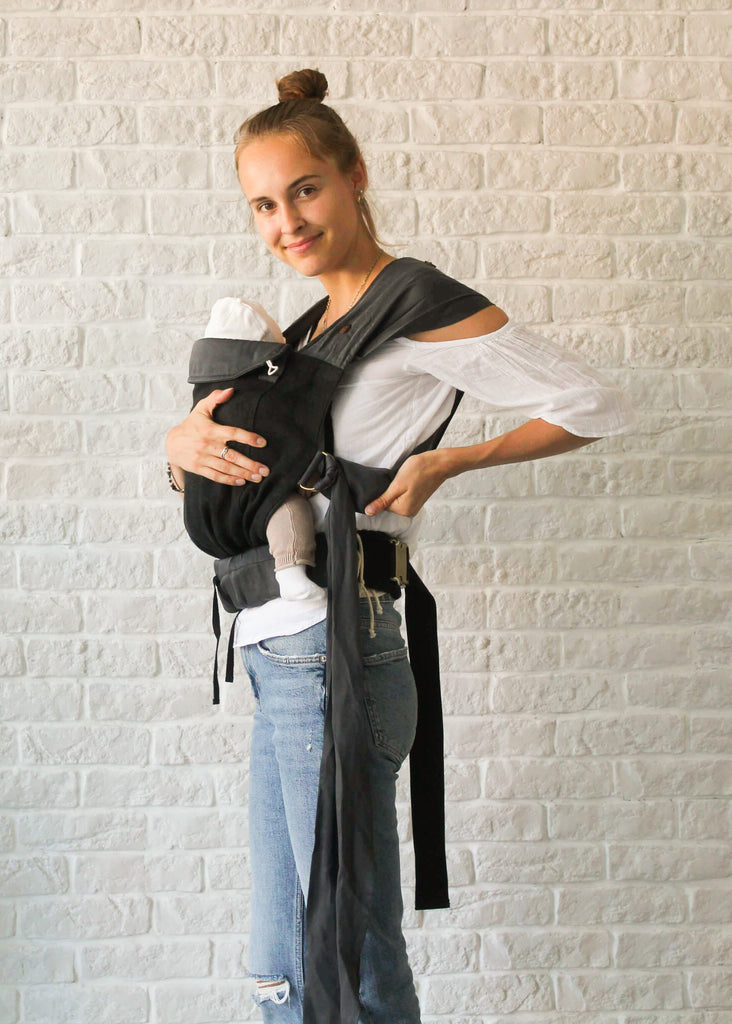
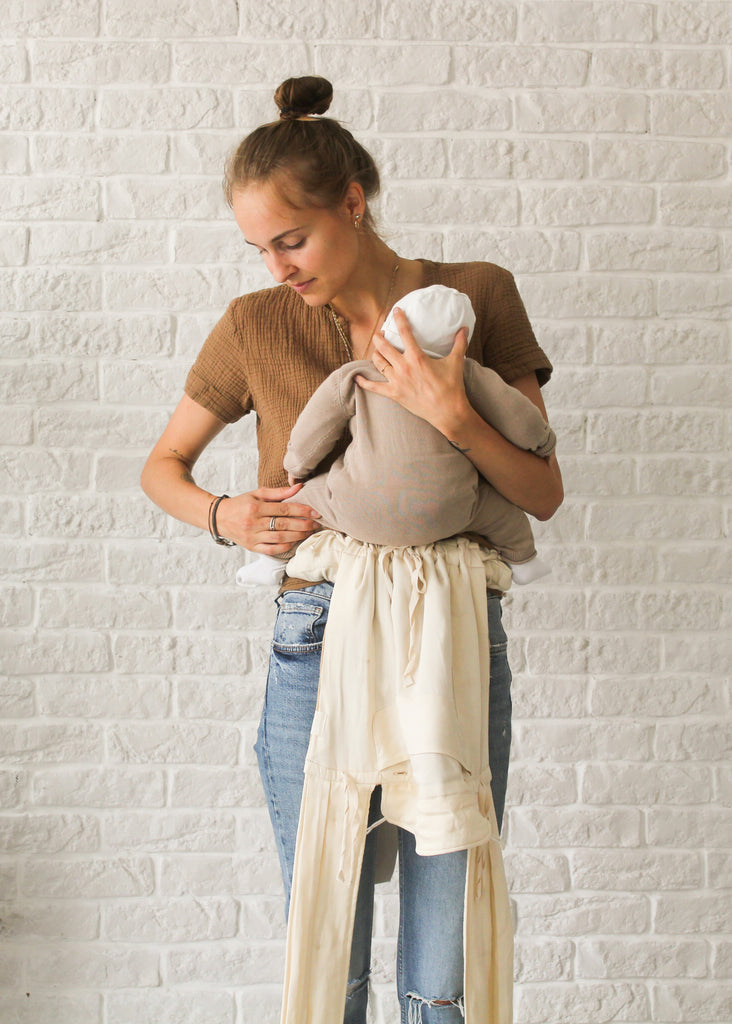
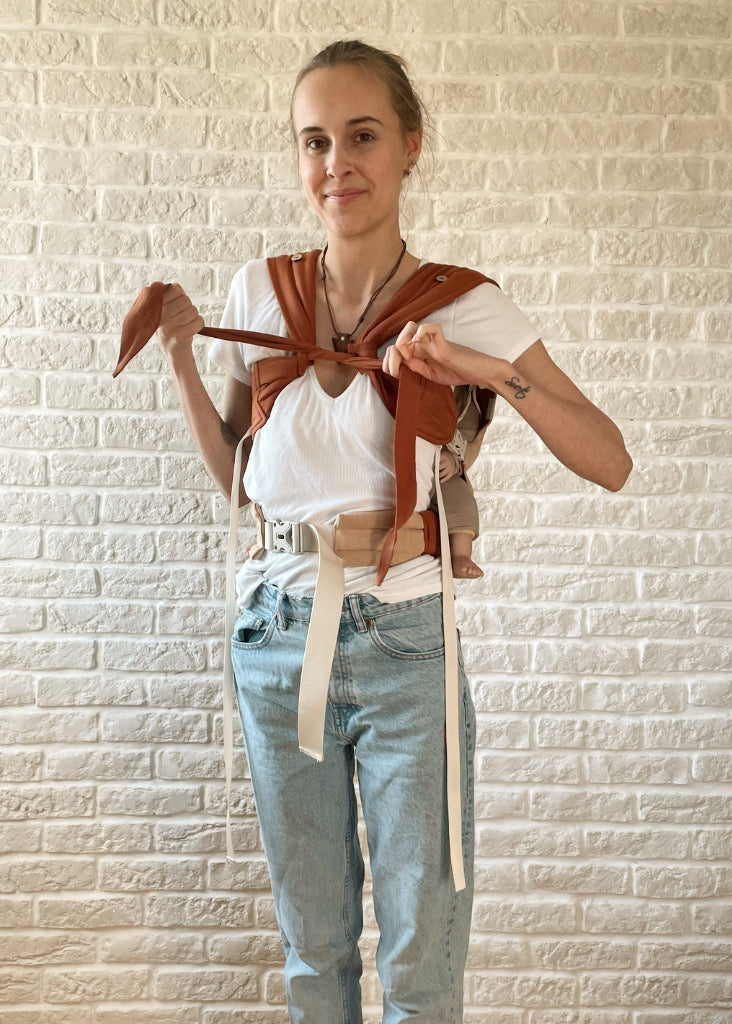
Now you can pull the cloths a little tighter as needed so that your baby sits close to your upper body in the carrier. To do this, pull the loose material of the sling to the front and then tighten it at the end. Your baby should sit at a height where you can give her/him a kiss on the head.
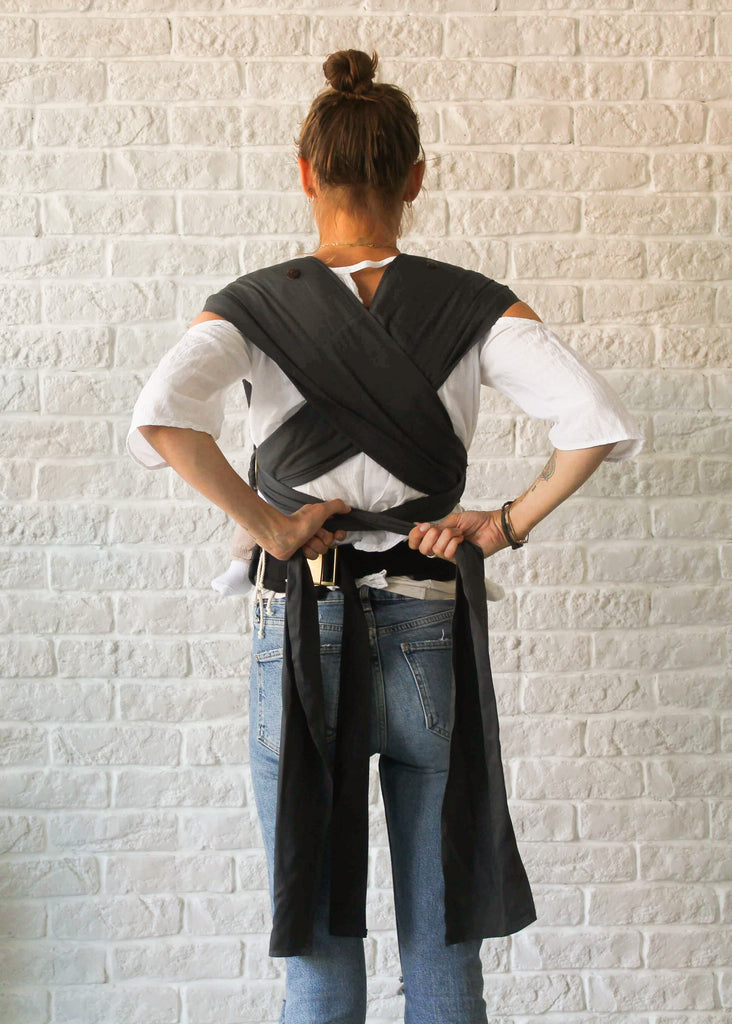
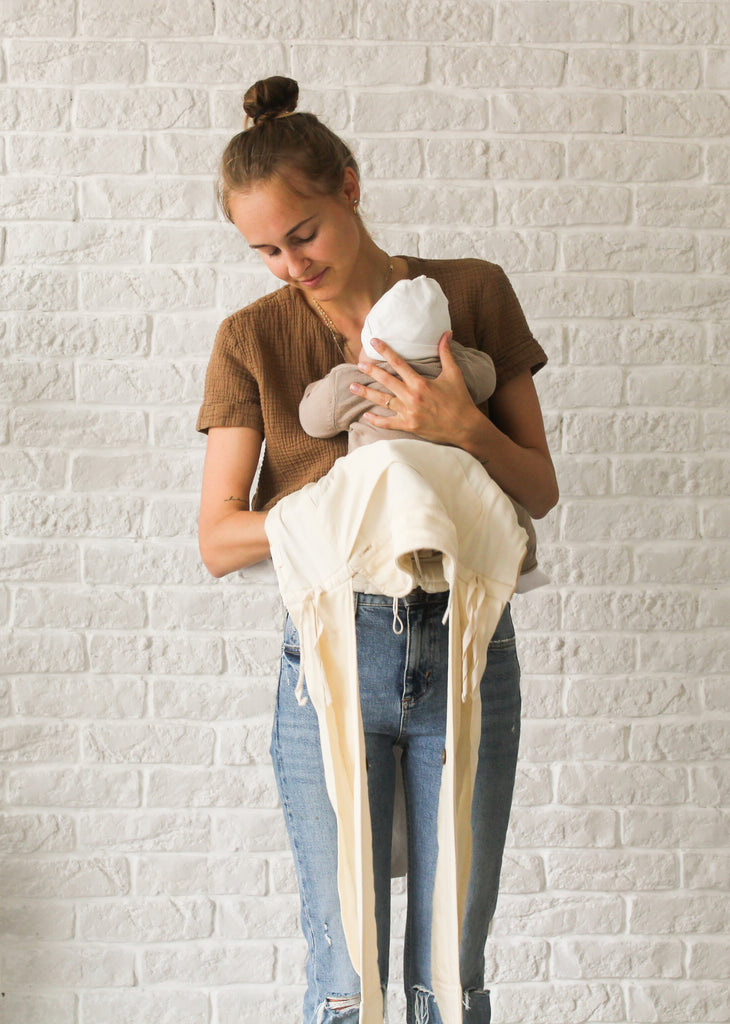
Now take the remaining cloth straps to the back and tie a knot.
If needed, for example when your baby is sleeping, you can also attach the small headrest with the elastics in the lower buttons.
The large detachable headrest or sunshade you can gather as needed.
Attach them to the shoulder straps using the loops on the back buttons.
You can apply these settings to your newborn as needed.
The detachable headrest is particularly suitable for newborns to provide extra padding for the neck area.
Roll them up and stow them in the inside pocket.
To give extra support to the neck area of small babies, you can tie the side straps, which are incorporated on the inside of the shoulder straps, tightly together at the front. This tightens the neck area again and gives more support.
You can also use these when your baby sleeps with their head on their side, allowing more fresh air to pass between the straps.

So you put your baby back safely after using your baby carrier :)
To get your baby out of the carrier, undo the knot of the sling straps. Lift your baby's bottom a little with one hand to take the tension out of the rings and make them easier to open.
Then, with your thumb, reach between the cloth against you and the ring above it and push some fabric through the opening to loosen it.
Now you can pull the loose piece of cloth completely out of the rings. Repeat the process on the other side.
Fold the back part down and place your baby safely. Last but not least, you can open the waist belt and put the carrier down.
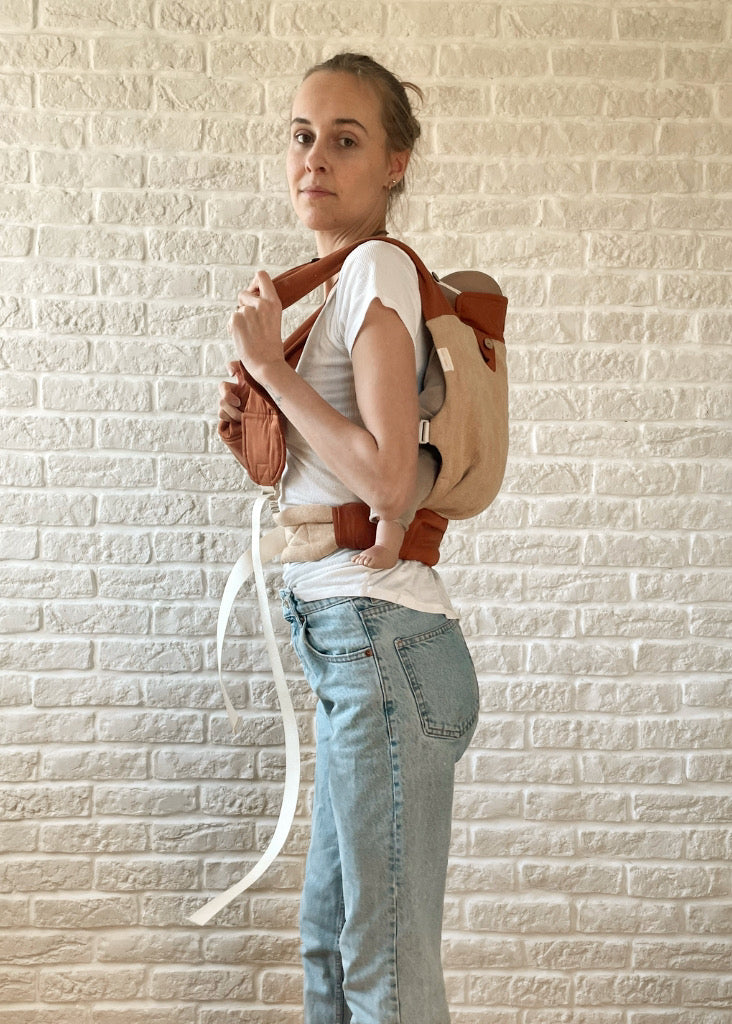
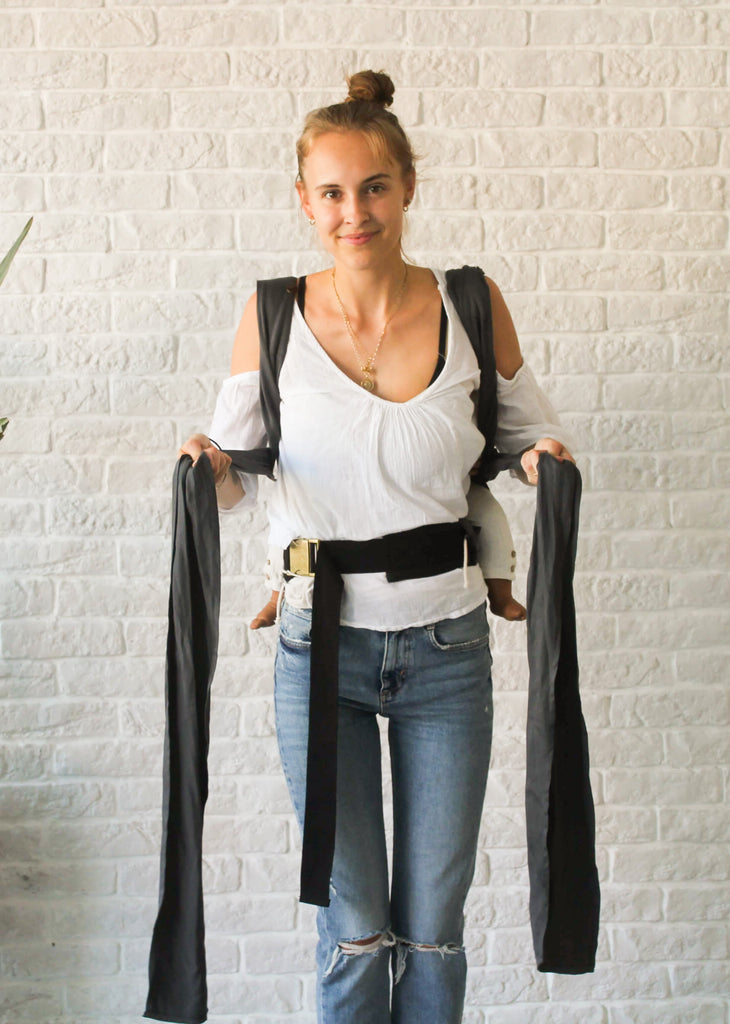
Step by Step... Carrying on the back

Here we show you step by step how to put our sling carriers on your back by yourself :)

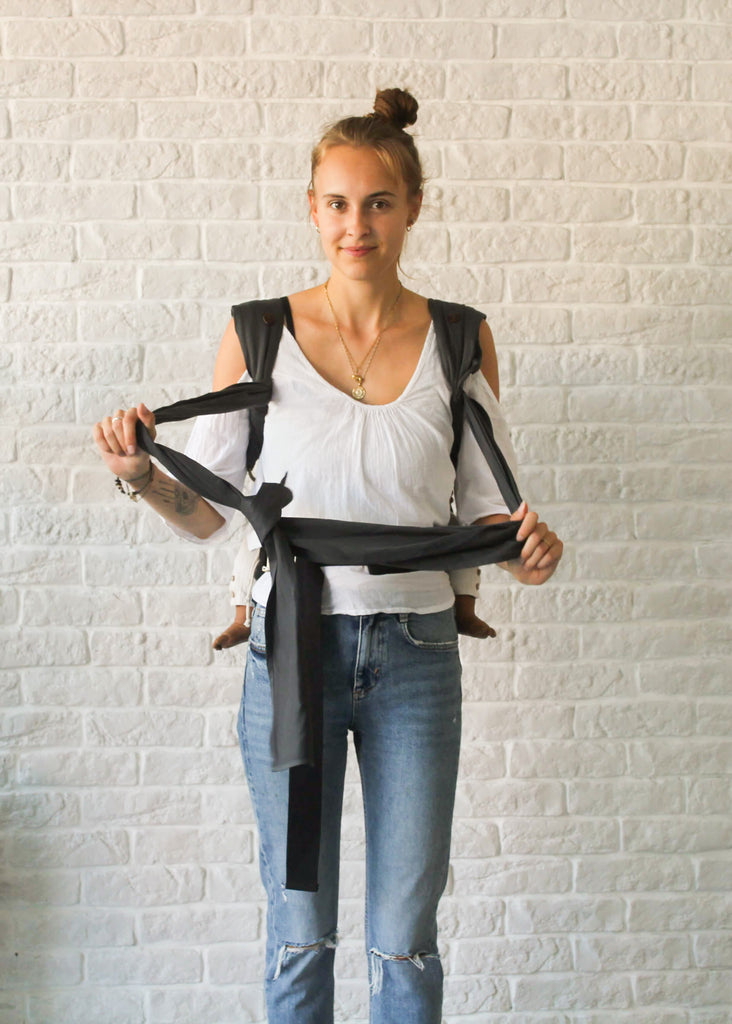
Hold the baby carrier with the label outwards in front of you and turn the waist belt so that the inside is facing your belly. The is our starting position.

Now close the buckle on the waist belt. Let it still a little loose, so that you can still move it well.
Pull the safety rubber already over the buckle.
Grab one of the two cloth straps. Now we thread this through the rings which are on the same side as the rings (like a backpack).
To do this, run the sling through both rings, starting with the ring closest to the inside of your stretcher.
Then unfold the rings and thread the cloth again only through the inner ring we started with in the first step.
Repeat the whole process on the other side.
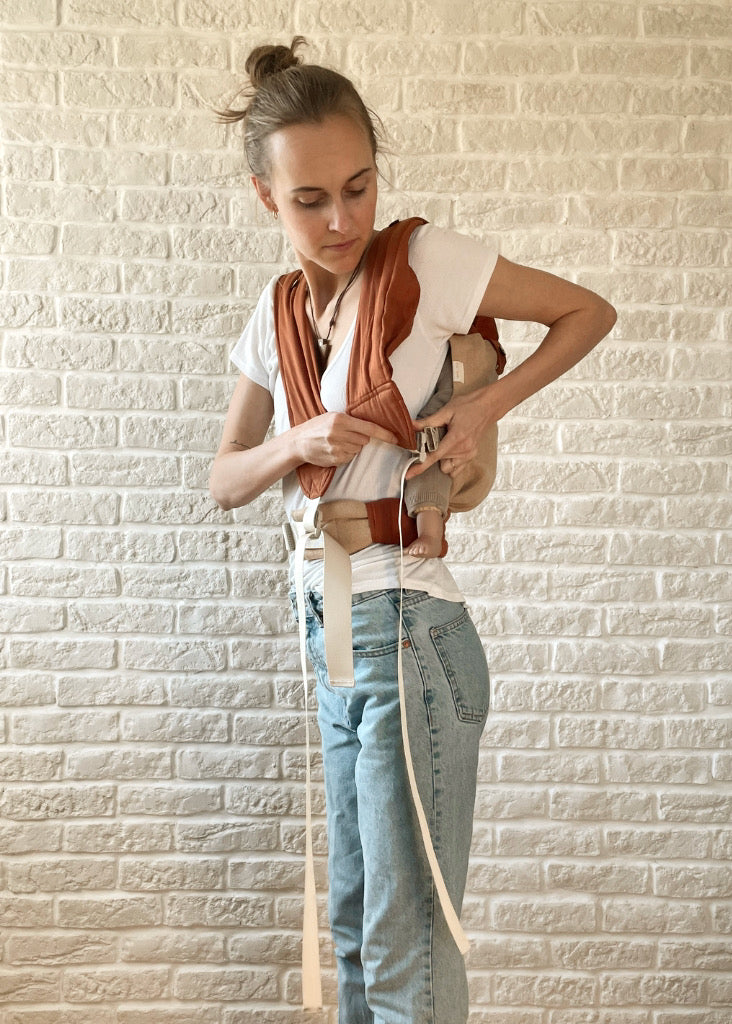
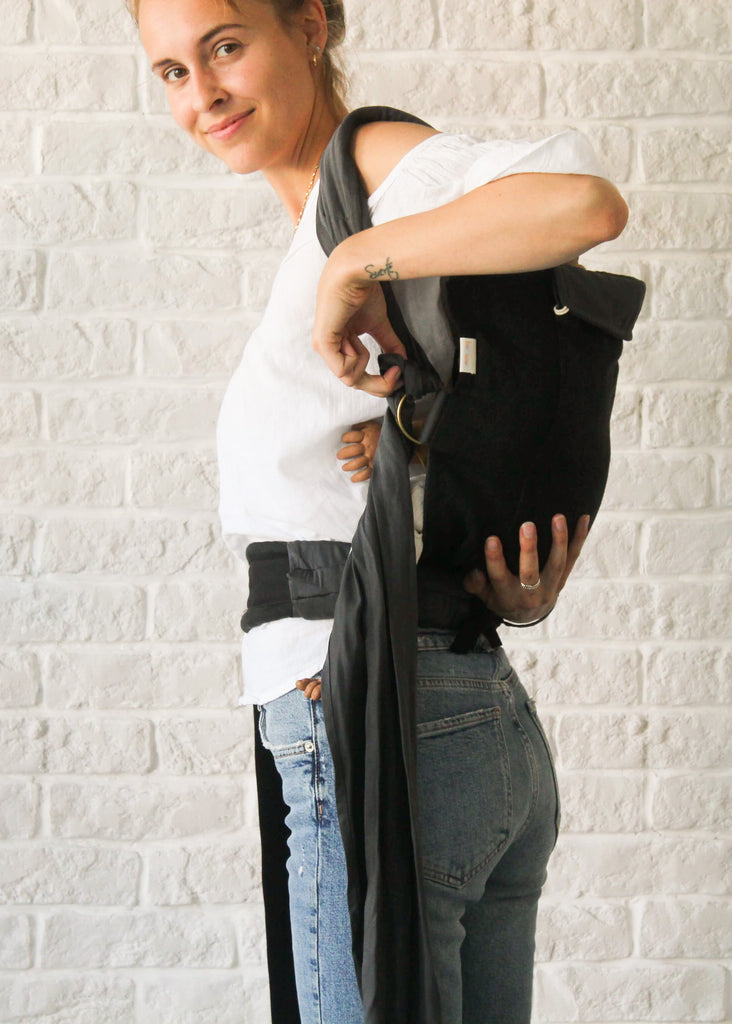
Pull the carrier to either side of your hip and place your baby on it.
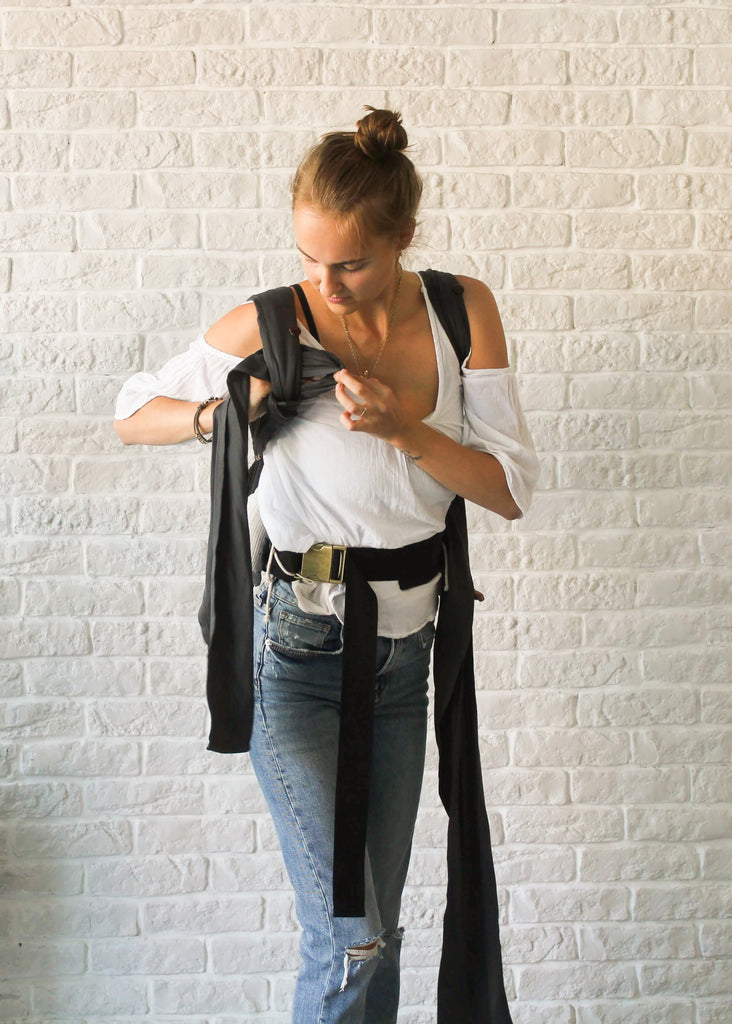
Then fold up the back part and grab the straps of the baby carrier (if the baby is sitting on your left side, take the straps in your right hand, or the other way around). Take them together in front of your baby's chest to form the secure pouch.

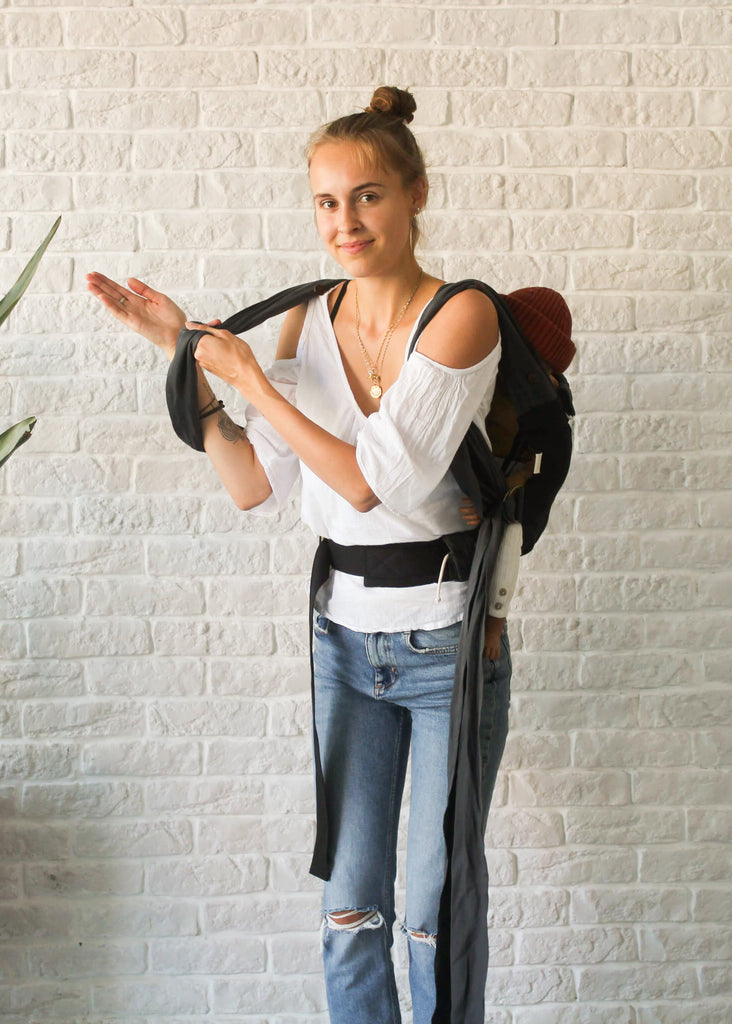
Slide your free arm forward underneath the straps between your side and the baby's belly. The arm already goes through the first strap.
Lean forward slightly while gently pushing your baby onto your back by the waist belt with your free hand.
Pull the first cloth carrier already a little tighter.
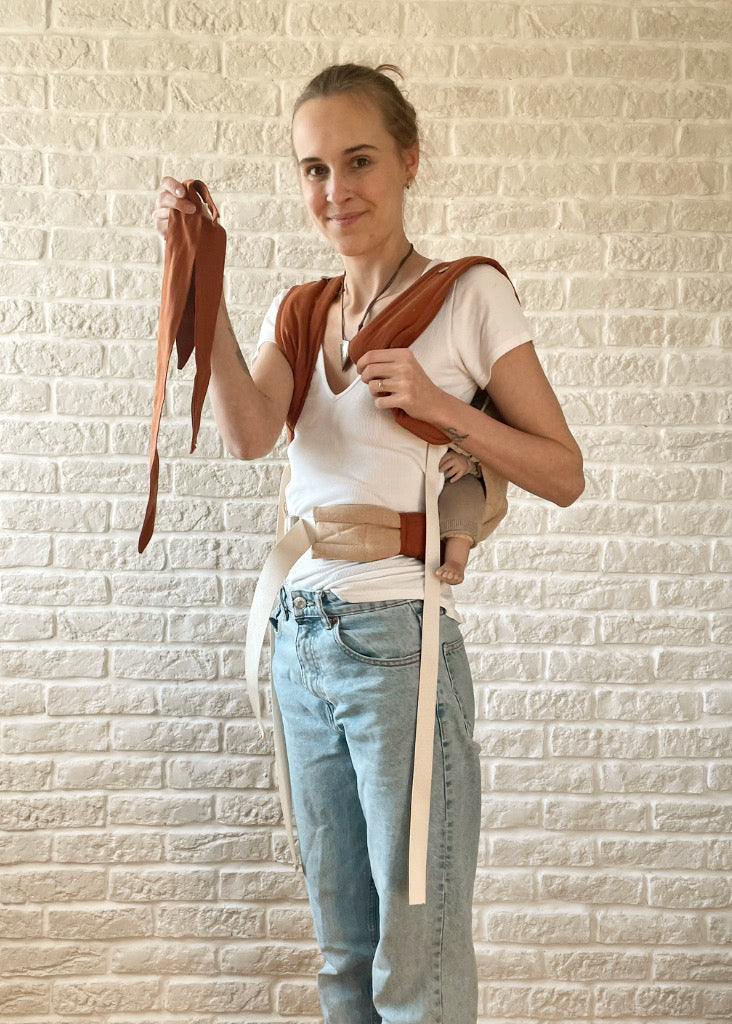
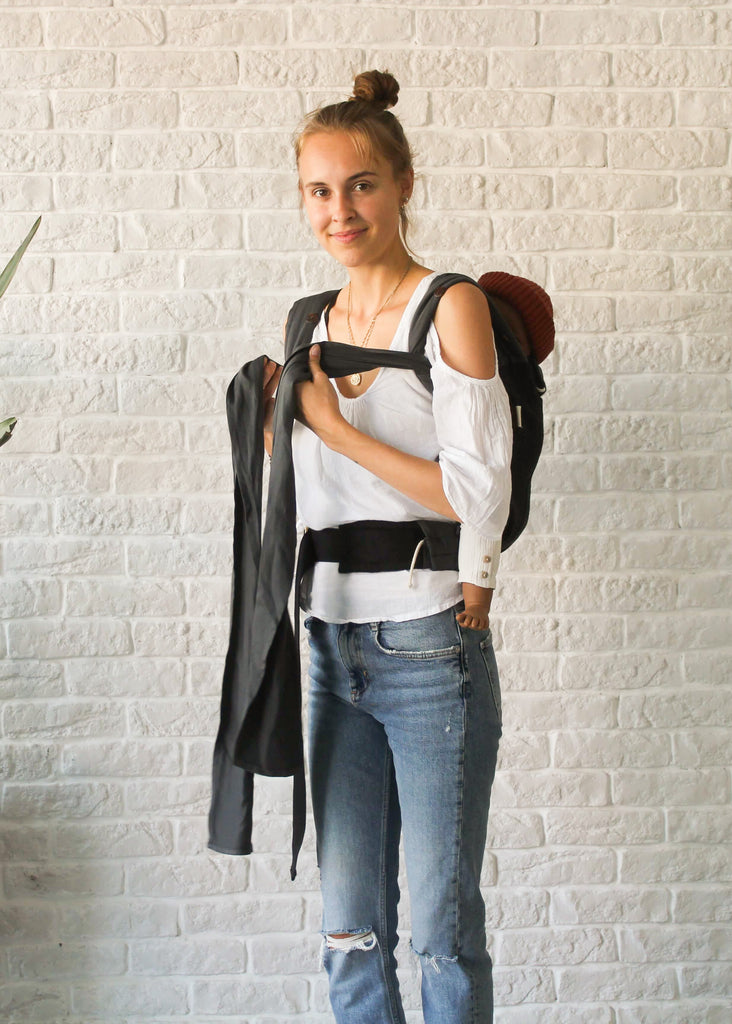
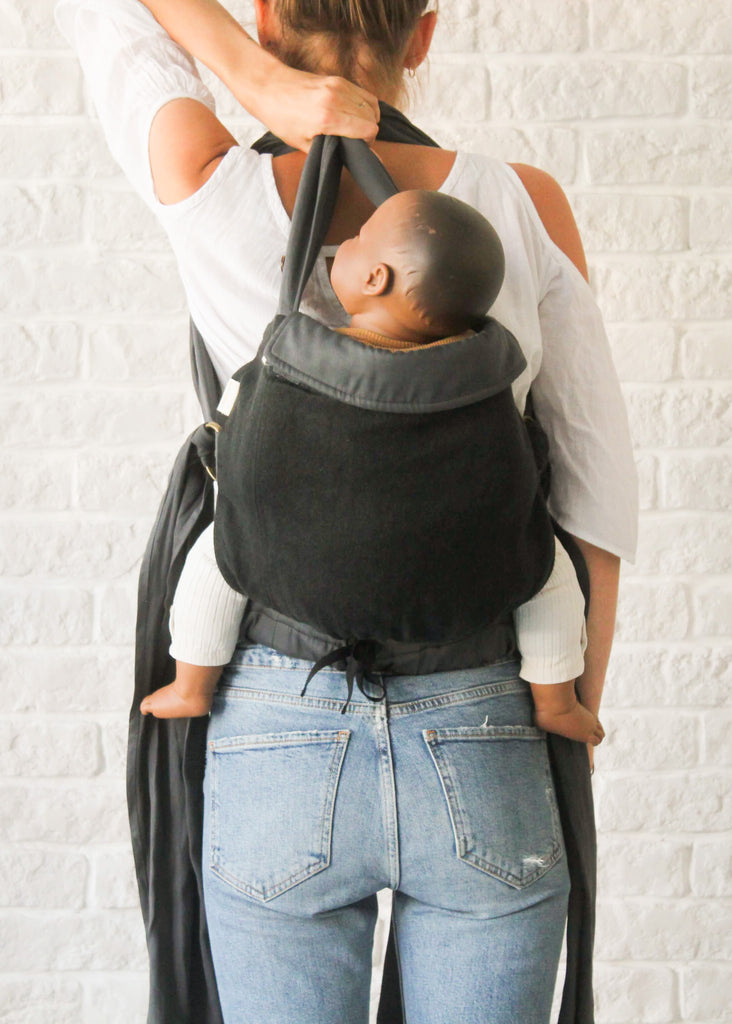
Now change hands and grab the second strap with your free hand.
Bring the second strap forward and guide your arm through it.
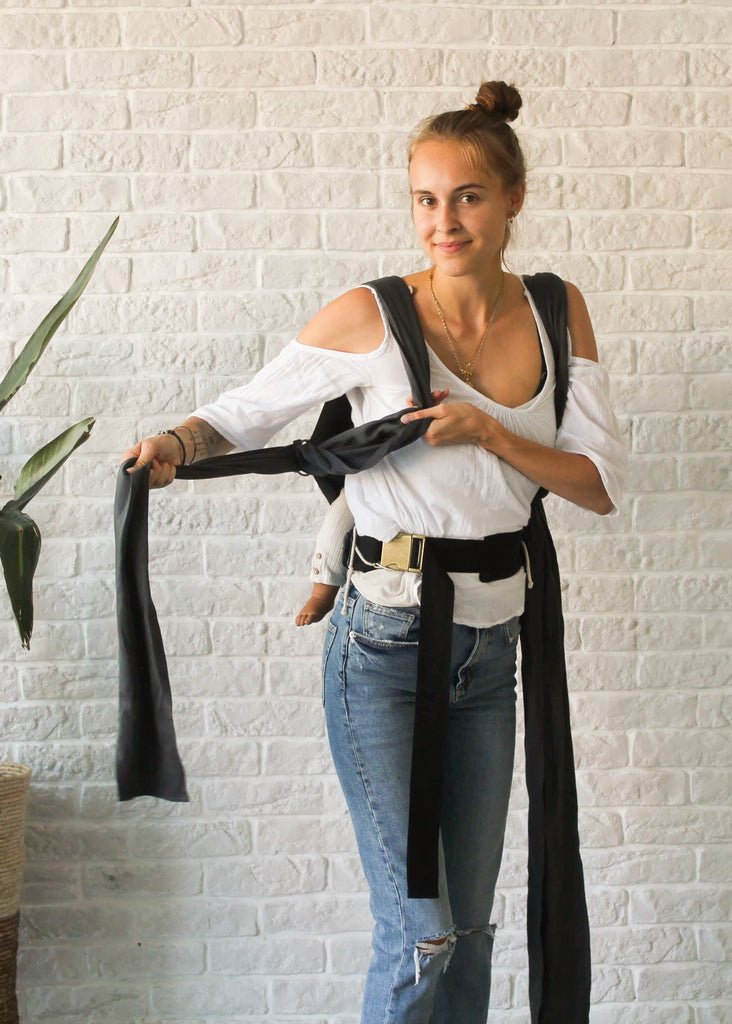
Now you can also tighten the second cloth carrier.
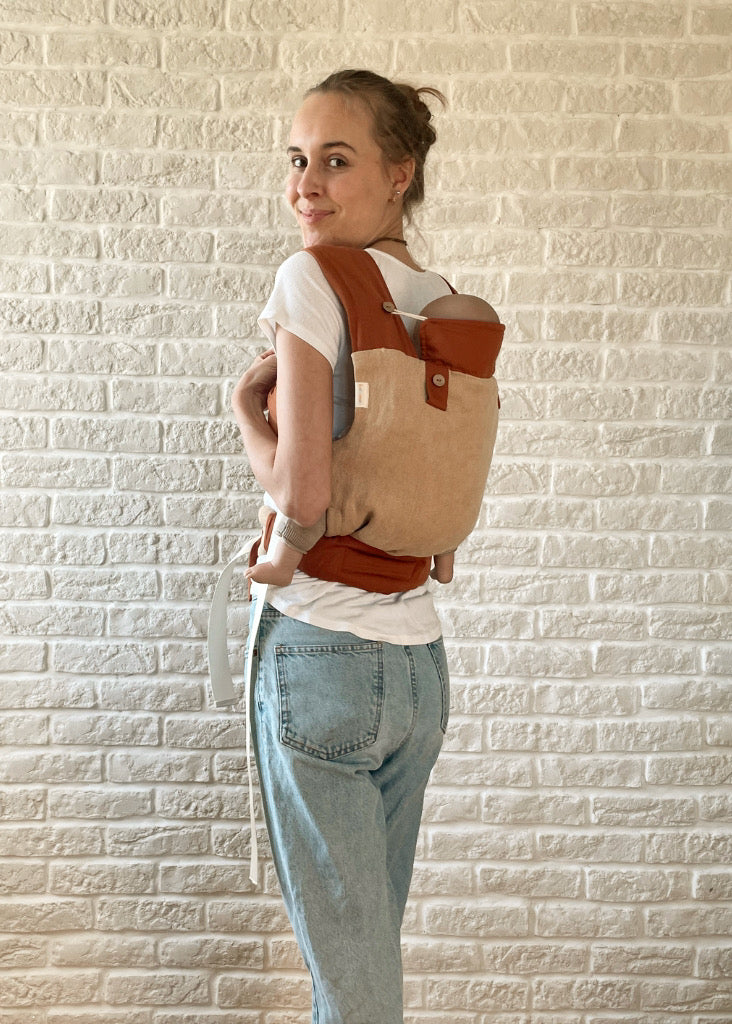
Now you can bring your baby up to the right height by pulling the straps forward, so that he or she sits nice and tight & secure in the carrier.
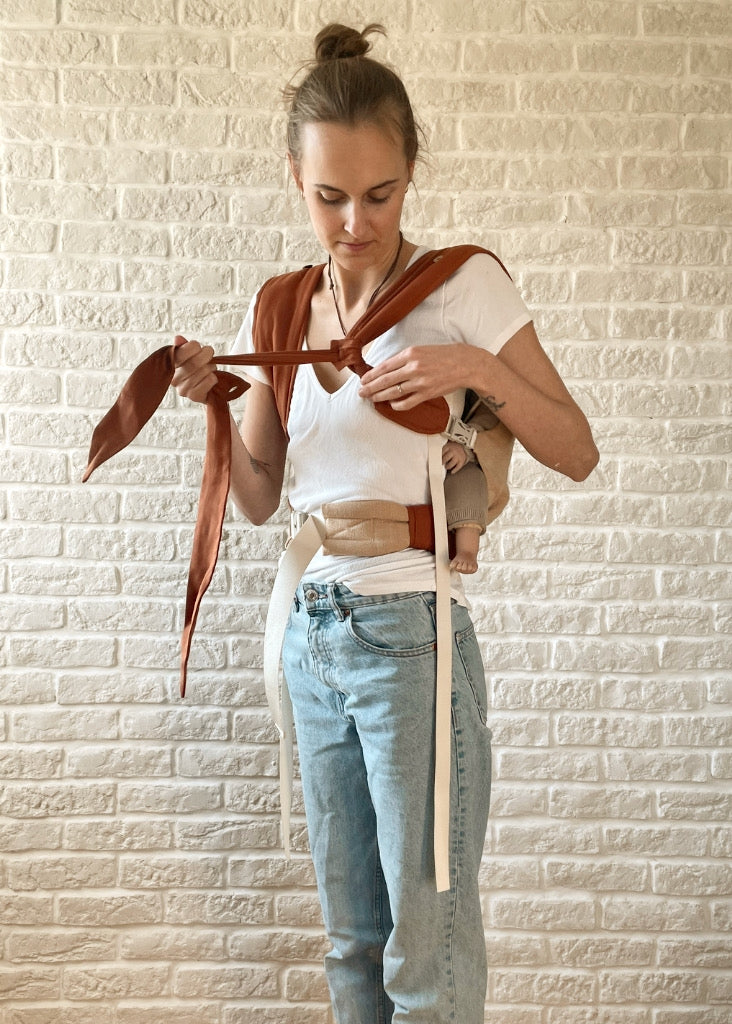
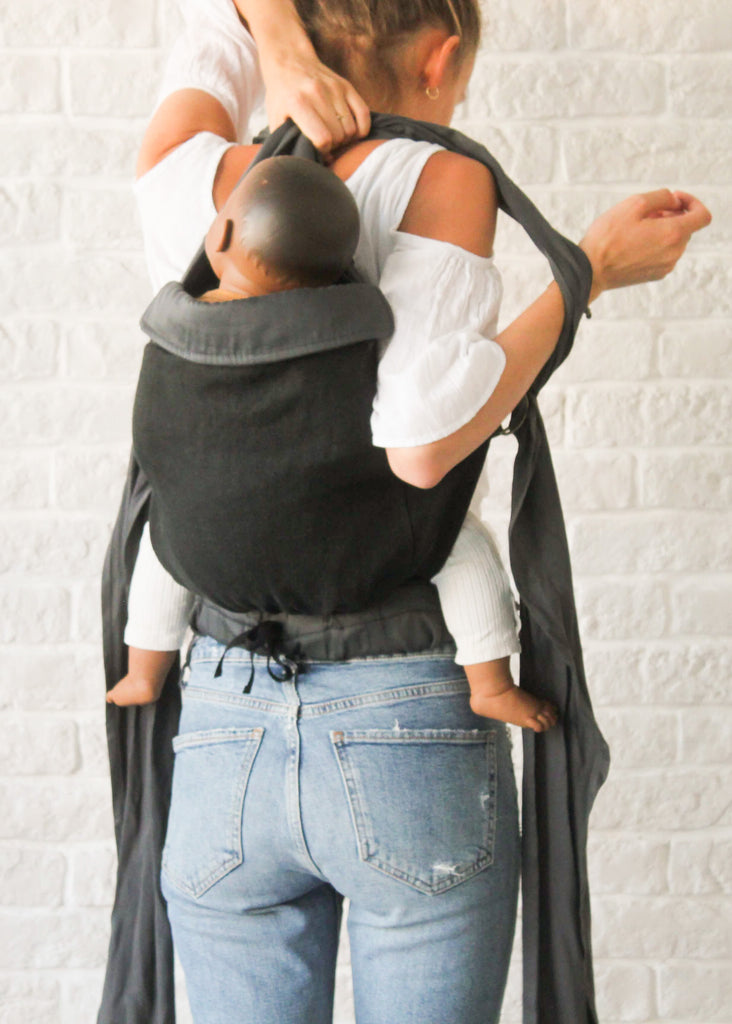
For the chest strap, you can either thread the straps up a few times and knot them.
Or, even easier, thread each directly through the opposite shoulder strap and then knot so that the straps cross on your chest.
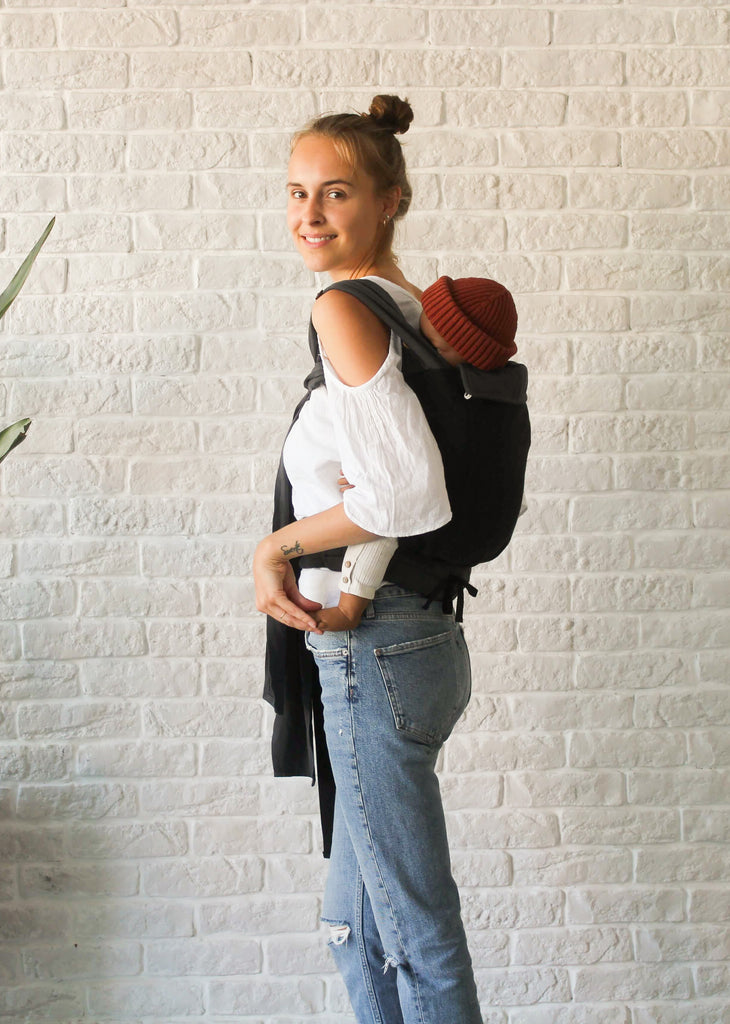
Done :)

Now we'll show you how to safely put your baby down again without help.
Loosen the chest strap again.
Now loosen both sides of the straps a little. To do this, lift your baby's bottom to be able to loosen the rings more easily. Press with your thumb between the rings and push some fabric through the opening. Now pull the loose fabric a bit out of the rings.
Once you've loosened the straps a bit, clasp them both together with one hand at the nape of your neck.
Now slip one arm out of the carrier.
And then use your other hand to pull your baby forward towards you.
Fold the back part down and place your baby safely. Last but not least, you can open the waist belt and put the carrier down.

Quick delivery
with DHL Go Green

Test 30 days
free of charge
Handmade & produced
with love
Shipping within
1-3 business days

Payment methods
Shipping within 1-3 working days
About us
© 2021 bohoney | Prices incl. VAT and plus shipping costs